SweetFX İle Oyunlarda Grafik Kalitenizi Arttırın

Bu konuyu okuyanlar

Ben Kenobi

Dekan
Katılım
6 Kasım 2011
Mesajlar
7,336
Reaksiyon puanı
3,155
Puanları
113
SweetFX oyunlardaki görüntü kalitesini arttırmaya yarayan bir araçtır.
Directx9, 10 ve 11 destekleyen tüm oyunlarda çalışır.
Standart DirectX dosyalarının yerini alıp içerisindeki bazı algoritmaları değiştirerek oyunlardaki görüntüyü kişiselleştirip, gerçekçiliği arttırmanızı sağlar.
Ayrıca en son antialising teknolojisi olan SMAA'yı oyunlara enjekte edebilir.

Ayrıntılı bilgi için
http://www.guru3d.com/files_details/sweetfx_shader_suite_download.html

Örnek olarak benim SweetFX'i kurcalamam sonucu Modern Warfare 2'de yaptığım bazı değişiklikler;
Ekran görüntülerinde biraz daha zor farkedilse de oyun içerisinde daha rahat farkedilmekte.

Kapalı http://s1.postimage.org/z71ajwfvx/iw4sp_2013_01_05_22_42_49_73.jpg
Açık http://s1.postimage.org/r2t6f5tgt/iw4sp_2013_01_05_22_42_52_32.jpg

Kapalı http://s1.postimage.org/jbcgglpbh/iw4sp_2013_01_05_22_46_38_58.jpg
Açık http://s1.postimage.org/yy3ptz33h/iw4sp_2013_01_05_22_46_40_21.jpg

Kapalı http://s1.postimage.org/5k7zee0dp/iw4sp_2013_01_05_22_47_12_56.jpg
Açık http://s1.postimage.org/7daw2plkd/iw4sp_2013_01_05_22_47_16_19.jpg

Kapalı http://s1.postimage.org/lxryxjgj1/iw4sp_2013_01_05_22_48_04_99.jpg
Açık http://s1.postimage.org/hd5silwtp/iw4sp_2013_01_05_22_48_07_72.jpg

Kapalı http://s1.postimage.org/v6z74rvql/iw4sp_2013_01_05_22_49_04_56.jpg
Açık http://s1.postimage.org/4af7wgcx9/iw4sp_2013_01_05_22_49_06_80.jpg

Kapalı http://s1.postimage.org/sffxe5x7x/iw4sp_2013_01_05_22_50_42_08.jpg
Açık http://s1.postimage.org/9oe0402nh/iw4sp_2013_01_05_22_50_44_41.jpg

Kapalı http://s1.postimage.org/fdu8ob8tp/iw4sp_2013_01_05_22_55_34_38.jpg
Açık http://s1.postimage.org/gu5r6gbql/iw4sp_2013_01_05_22_55_36_55.jpg

Kapalı http://s1.postimage.org/3ra4n6lil/iw4sp_2013_01_05_22_55_48_32.jpg
Açık http://s1.postimage.org/3sk2glncd/iw4sp_2013_01_05_22_55_51_02.jpg

Kapalı http://s1.postimage.org/egntffxbh/iw4sp_2013_01_05_22_56_49_28.jpg
Açık http://s1.postimage.org/3v3y3fqzx/iw4sp_2013_01_05_22_56_51_28.jpg

Kapalı http://s1.postimage.org/499vgs0h9/iw4sp_2013_01_05_23_05_37_42.jpg
Açık http://s1.postimage.org/6f46ba3xp/iw4sp_2013_01_05_23_05_38_97.jpg

Kapalı http://s1.postimage.org/elw62uu0d/iw4sp_2013_01_05_23_08_40_80.jpg
Açık http://s1.postimage.org/lqdzbw19p/iw4sp_2013_01_05_23_08_42_21.jpg

Kapalı http://s1.postimage.org/f17fvvfxp/iw4sp_2013_01_05_23_12_43_60.jpg
Açık http://s1.postimage.org/7z9i9ocbx/iw4sp_2013_01_05_23_12_45_28.jpg

Kullandığım ayarlar
Kod:
/*-----------------------------------------------------------.  /                      Choose effects                         /
  '-----------------------------------------------------------*/


// Set to 1 for ON or 0 for OFF
#define USE_SMAA_ANTIALIASING 1 //[0 or 1] SMAA Anti-aliasing : Smoothens jagged lines.
#define USE_LUMASHARPEN   1 //[0 or 1] LumaSharpen : Also sharpens the antialiased edges which makes them less smooth - I'm working on fixing that.
#define USE_BLOOM         0 //[0 or 1] Bloom : Makes bright lights bleed their light into their surroundings (relatively high performance cost)
#define USE_HDR           0 //[0 or 1] HDR : Not actual HDR - It just tries to mimic an HDR look (relatively high performance cost)
#define USE_TECHNICOLOR   0 //[0 or 1] TECHNICOLOR : Attempts to mimic the look of an old movie using the Technicolor three-strip color process (Techicolor Process 4)
#define USE_DPX           0 //[0 or 1] Cineon DPX : Should make the image look like it's been converted to DXP Cineon - basically it's another movie-like look similar to technicolor.
#define USE_LIFTGAMMAGAIN 1 //[0 or 1] Lift Gamma Gain : Adjust brightness and color of shadows, midtones and highlights (avoids clipping)
#define USE_TONEMAP       0 //[0 or 1] Tonemap : Adjust gamma, exposure, saturation, bleach and defog. (may cause clipping)
#define USE_VIBRANCE      1 //[0 or 1] Vibrance : Intelligently saturates (or desaturates if you use negative values) the pixels depending on their original saturation.
#define USE_CURVES        1 //[0 or 1] Curves : Contrast adjustments using S-curves.
#define USE_SEPIA         0 //[0 or 1] Sepia : Sepia tones the image.
#define USE_VIGNETTE      0 //[0 or 1] Vignette : Darkens the edges of the image to make it look more like it was shot with a camera lens. May cause banding artifacts.
#define USE_DITHER        0 //[0 or 1] Dither : Applies dithering to simulate more colors than your monitor can display. This lessens banding artifacts (mostly caused by Vignette)
#define USE_SPLITSCREEN   0 //[0 or 1] Splitscreen : Enables the before-and-after splitscreen comparison mode.


   /*-----------------------------------------------------------.
  /                  SMAA Anti-aliasing settings                /
  '-----------------------------------------------------------*/


#define SMAA_THRESHOLD 0.12           // [0.05 to 0.20] Edge detection threshold
#define SMAA_MAX_SEARCH_STEPS 16      // [0 to 98] Determines the radius SMAA will search for aliased edges
#define SMAA_MAX_SEARCH_STEPS_DIAG 6  // [0 to 16] Determines the radius SMAA will search for diagonal aliased edges
#define SMAA_CORNER_ROUNDING 0        // [0 to 100] Determines the percent of antialiasing to apply to corners.


// -- Advanced SMAA settings --
#define COLOR_EDGE_DETECTION 0        // [0 or 1] 1 Enables color edge detection (slower but slightly more acurate) - 0 uses luma edge detection (faster)
#define SMAA_DIRECTX9_LINEAR_BLEND 0  // [0 or 1] Using DX9 HARDWARE? (software version doesn't matter) if so this needs to be 1 - If not, leave it at 0.


   /*-----------------------------------------------------------.
  /                       LumaSharpen settings                  /
  '-----------------------------------------------------------*/
// -- Sharpening --
#define sharp_strength 2.00   // [0.10 to 3.00] Strength of the sharpening
#define sharp_clamp    0.035  // [0.000 to 1.000] Limits maximum amount of sharpening a pixel recieves - Default is 0.035


// -- Advanced sharpening settings --
#define pattern 4        // [1|2|3|4] Choose a sample pattern. 1 = Fast, 2 = Normal, 3 = Wider, 4 = Pyramid shaped.
#define offset_bias 1.0  // [0.0 to 6.0] Offset bias adjusts the radius of the sampling pattern.
                         // I designed the pattern for offset_bias 1.0, but feel free to experiment.
                           
// -- Debug sharpening settings --
#define show_sharpen 0   // [0 or 1] Visualize the strength of the sharpen (multiplied by 4 to see it better)


   /*-----------------------------------------------------------.
  /                       Bloom settings                        /
  '-----------------------------------------------------------*/
#define BloomThreshold 20.25 //[0.00 to 50.00] Threshold for what is a bright light (that causes bloom) and what isn't.
#define BloomPower 1.446     //[0.0000 to 8.0000] Strength of the bloom
#define BloomWidth 0.0142    //[0.0000 to 1.0000] Width of the bloom


   /*-----------------------------------------------------------.
  /                        HDR settings                         /
  '-----------------------------------------------------------*/
#define HDRPower 1.30  //[0.0 to 8.0] Strangely lowering this makes the image brighter
#define radius2  0.87  //[0.0 to 8.0] Raising this seems to make the effect stronger and also brighter


   /*-----------------------------------------------------------.
  /                      TECHNICOLOR settings                   /
  '-----------------------------------------------------------*/
#define TechniAmount 0.11        //[0.0 to 1.0]
#define TechniPower  2.8         //[0.0 to 8.0]
#define redNegativeAmount   0.88 //[0.0 to 1.0]
#define greenNegativeAmount 0.88 //[0.0 to 1.0]
#define blueNegativeAmount  0.88 //[0.0 to 1.0]


   /*-----------------------------------------------------------.
  /                      Cineon DPX settings                    /
  '-----------------------------------------------------------*/
#define Red   8.0  //[1.0 to 15.0]
#define Green 8.0  //[1.0 to 15.0]
#define Blue  8.0  //[1.0 to 15.0]


#define ColorGamma    2.5  //[0.1 to 2.5] Adjusts the colorfulness of the effect in a manner similar to Vibrance. 1.0 is neutral.
#define DPXSaturation 3.0  //[0.0 to 8.0] Adjust saturation of the effect. 1.0 is neutral.


#define RedC   0.36  //[0.6 to 0.2]
#define GreenC 0.36  //[0.6 to 0.2]
#define BlueC  0.34  //[0.6 to 0.2]


#define Blend 0.2    //[0.0 to 0.1] How strong the effect should be.


   /*-----------------------------------------------------------.
  /                      Lift Gamma Gain settings               /
  '-----------------------------------------------------------*/
#define RGB_Lift  float3(1.050, 1.030, 1.000)  //[0.000 to 2.000] Adjust shadows for Red, Green and Blue
#define RGB_Gamma float3(1.000, 1.000, 1.000)  //[0.000 to 2.000] Adjust midtones for Red, Green and Blue
#define RGB_Gain  float3(1.000, 1.000, 1.000)  //[0.000 to 2.000] Adjust highlights for Red, Green and Blue


   /*-----------------------------------------------------------.
  /                        Tonemap settings                     /
  '-----------------------------------------------------------*/
#define Gamma 0.4        //[0.00 to 2.00] Adjust midtones


#define Exposure 0.00    //[-1.00 to 1.00] Adjust exposure


#define Saturation 0.00  //[-1.00 to 1.00] Adjust saturation


#define Bleach 0.00      //[0.00 to 1.00] Brightens the shadows and fades the colors


#define Defog 0.000  //[0.00 to 1.00] How much of the color tint to remove
#define FogColor float3(0.00, 0.00, 2.55) //[0.00 to 1.00, 0.00 to 1.00, 0.00 to 1.00] What color to remove - default is blue


   /*-----------------------------------------------------------.
  /                       Vibrance settings                     /
  '-----------------------------------------------------------*/
#define Vibrance -0.20 //[-1.0 to 1.0] Intelligently saturates (or desaturates if you use negative values) the pixels depending on their original saturation.


   /*-----------------------------------------------------------.
  /                        Curves settings                      /
  '-----------------------------------------------------------*/
#define Curves_contrast 0.20  //[-1.0 to 1.0] The amount of contrast you want


// -- Advanced curve settings --
#define Curves_formula 7      //[1|2|3|4|5|6|7] The constrast s-curve you want to use. 


   /*-----------------------------------------------------------.
  /                         Sepia settings                      /
  '-----------------------------------------------------------*/
#define ColorTone float3(0.90, 90, 90) //[0.00 to 1.00, 0.00 to 1.00, 0.00 to 1.00] What color to tint the image
#define GreyPower  0.11                    //[0.0 to 1.0] How much desaturate the image before tinting it
#define SepiaPower 0.58                    //[0.0 to 1.0] How much to tint the image


   /*-----------------------------------------------------------.
  /                       Vignette settings                     /
  '-----------------------------------------------------------*/
#define VignetteRadius 1.00   //[-1.00 to 3.00] lower values = stronger radial effect from center
#define VignetteAmount -1.00  //[-2.00 to 1.00] Strength of black. -2.00 = Max Black, 1.00 = Max White.
#define VignetteSlope 8       //[1 to 16] How far away from the center the change should start to really grow strong (odd numbers cause a larger fps drop than even numbers)
#define VignetteCenter float2(0.500, 0.500)  //[0.00 to 1.00] Center of effect.


   /*-----------------------------------------------------------.
  /                        Dither settings                      /
  '-----------------------------------------------------------*/
//No settings yet, beyond switching it on or off in the top section.


//Note that the checkerboard pattern used by Dither, makes an image harder to compress.
//This can make your screenshots and video recordings take up more space.


   /*-----------------------------------------------------------.
  /                     Splitscreen settings                    /
  '-----------------------------------------------------------*/
#define splitscreen_mode 3  //[1|2|3|4|5]  1 = Vertical 50/50 split, 2 = Vertical 25/50/25 split, 3 = Vertical 50/50 angled split, 4 = Horizontal 50/50 split, 5 = Horizontal 25/50/25 split

Not 1: Sweetfx ekran kartı çok iyi olup da daha fazla detay, görsellik, kalite isteyenler için yapılmıştır. Performansı düşürür. Zar zor oynadığınız oyunlarda kullanmak yersizdir.

Not 2: Nvidia Optimus ile Sweetfx çalıştırmasında bir sorun olmakta. Sweetfx'e geçince nedense bilgisayar Intel'e geçmekte ısrar etmekte. Eğer Optimus kullanıyorsanız oyunun orjinal exe dosyasını yedekleyin. Daha sonra exe'yi Notepad++ ile açıp ne kadar d3d9 varsa d3fx yapın ve kaydedin. Sweetfx içerisindeki d3d9.dll ismini de d3fx.dll olarak değiştirin.
 

rozabay

Dekan
Katılım
4 Nisan 2009
Mesajlar
7,113
Reaksiyon puanı
34
Puanları
48
[MENTION=195265]Ben Kenobi[/MENTION] Peki donanım gereksinimleri olarak bir artış oluyor mu ? Yani oyunun önerilen donanım gereksinimlerini geçiyor mu ?
 

Ben Kenobi

Dekan
Katılım
6 Kasım 2011
Mesajlar
7,336
Reaksiyon puanı
3,155
Puanları
113
Ekran kartınızın iyi olması lazım sadece.
En çok SMAA etkiliyor performansı.
Tabi biraz da ayarlarınıza bağlı, farklı ayarlar farklı oranda etkiliyor.
Genel olarak benim ayarım 10-15 fps arası düşürdü.
Ekran görüntülerinden az farkedilse de oynarken çok farkediliyor, zaten açma kapama tuşu var Num Lock ile farkı görüyorsunuz.

Bir de her oyunda farklı ayar gerekiyor mesela ben renklerini kıstım, kontrastı ise artırdım, yüksek oranda sharpen ile kaplamaları belirginleştirdim, gölgelerdeki kırmızı ve yeşil renk oranını arttırdım, biraz da SMAA ekledim. Siz kendi zevkinize göre ayarlayabilirsiniz.
 

hulusi98

Asistan
Katılım
17 Kasım 2012
Mesajlar
275
Reaksiyon puanı
8
Puanları
0
resimlerdeki gibi ise baya grafik kalitesini artırırım o zaman :)
 

Ben Kenobi

Dekan
Katılım
6 Kasım 2011
Mesajlar
7,336
Reaksiyon puanı
3,155
Puanları
113
resimlerdeki gibi ise baya grafik kalitesini artırırım o zaman :)

resimlerde pek belli olmuyor.
ayrıca zaten ayarlar bana ait. mümkün mertebe orjinale sadık kalmaya çalıştım.
siz kendi ayarınızı yaparak farklı bir hale de getirebilirsiniz.
örneğin başka birine ait bir ayar http://i6.minus.com/ibhhVnX0nURYXW.jpg
zaten biz daha oyunları doğru düzgün kaldıran bilgisayarlara sahip değiliz ama diğer ülkelerde insanlar çok daha iyi bilgisayarlara çok daha ucuz fiyata sahip olduğu için daha fazla kalitenin yolunu araştırmış ve yapmış.
mesela bizde 3000 tl'den başlayan şu bilgisayar birleşik devletlerde 1000 dolardan başlıyor.
OriginalPng
 

rozabay

Dekan
Katılım
4 Nisan 2009
Mesajlar
7,113
Reaksiyon puanı
34
Puanları
48
resimlerde pek belli olmuyor.
ayrıca zaten ayarlar bana ait. mümkün mertebe orjinale sadık kalmaya çalıştım.
siz kendi ayarınızı yaparak farklı bir hale de getirebilirsiniz.
örneğin başka birine ait bir ayar http://i6.minus.com/ibhhVnX0nURYXW.jpg
zaten biz daha oyunları doğru düzgün kaldıran bilgisayarlara sahip değiliz ama diğer ülkelerde insanlar çok daha iyi bilgisayarlara çok daha ucuz fiyata sahip olduğu için daha fazla kalitenin yolunu araştırmış ve yapmış.
mesela bizde 3000 tl'den başlayan şu bilgisayar birleşik devletlerde 1000 dolardan başlıyor.
OriginalPng

Bana Alienware gösterme. Yok ki yurt dışına çıkan eşimiz dostumuz. Koyacam cebine parasını al gel diyecem ama yok işte.
 

Ben Kenobi

Dekan
Katılım
6 Kasım 2011
Mesajlar
7,336
Reaksiyon puanı
3,155
Puanları
113
VTMB
Kod:
   /*-----------------------------------------------------------.
  /                      Choose effects                         /
  '-----------------------------------------------------------*/


// Set to 1 for ON or 0 for OFF
#define USE_SMAA_ANTIALIASING 1 //[0 or 1] SMAA Anti-aliasing : Smoothens jagged lines.
#define USE_LUMASHARPEN   1 //[0 or 1] LumaSharpen : Also sharpens the antialiased edges which makes them less smooth - I'm working on fixing that.
#define USE_BLOOM         0 //[0 or 1] Bloom : Makes bright lights bleed their light into their surroundings (relatively high performance cost)
#define USE_HDR           0 //[0 or 1] HDR : Not actual HDR - It just tries to mimic an HDR look (relatively high performance cost)
#define USE_TECHNICOLOR   0 //[0 or 1] TECHNICOLOR : Attempts to mimic the look of an old movie using the Technicolor three-strip color process (Techicolor Process 4)
#define USE_DPX           0 //[0 or 1] Cineon DPX : Should make the image look like it's been converted to DXP Cineon - basically it's another movie-like look similar to technicolor.
#define USE_LIFTGAMMAGAIN 1 //[0 or 1] Lift Gamma Gain : Adjust brightness and color of shadows, midtones and highlights (avoids clipping)
#define USE_TONEMAP       1 //[0 or 1] Tonemap : Adjust gamma, exposure, saturation, bleach and defog. (may cause clipping)
#define USE_VIBRANCE      1 //[0 or 1] Vibrance : Intelligently saturates (or desaturates if you use negative values) the pixels depending on their original saturation.
#define USE_CURVES        1 //[0 or 1] Curves : Contrast adjustments using S-curves.
#define USE_SEPIA         0 //[0 or 1] Sepia : Sepia tones the image.
#define USE_VIGNETTE      0 //[0 or 1] Vignette : Darkens the edges of the image to make it look more like it was shot with a camera lens. May cause banding artifacts.
#define USE_DITHER        0 //[0 or 1] Dither : Applies dithering to simulate more colors than your monitor can display. This lessens banding artifacts (mostly caused by Vignette)
#define USE_SPLITSCREEN   0 //[0 or 1] Splitscreen : Enables the before-and-after splitscreen comparison mode.


   /*-----------------------------------------------------------.
  /                  SMAA Anti-aliasing settings                /
  '-----------------------------------------------------------*/


#define SMAA_THRESHOLD 0.12           // [0.05 to 0.20] Edge detection threshold
#define SMAA_MAX_SEARCH_STEPS 16      // [0 to 98] Determines the radius SMAA will search for aliased edges
#define SMAA_MAX_SEARCH_STEPS_DIAG 6  // [0 to 16] Determines the radius SMAA will search for diagonal aliased edges
#define SMAA_CORNER_ROUNDING 0        // [0 to 100] Determines the percent of antialiasing to apply to corners.


// -- Advanced SMAA settings --
#define COLOR_EDGE_DETECTION 1        // [0 or 1] 1 Enables color edge detection (slower but slightly more acurate) - 0 uses luma edge detection (faster)
#define SMAA_DIRECTX9_LINEAR_BLEND 0  // [0 or 1] Using DX9 HARDWARE? (software version doesn't matter) if so this needs to be 1 - If not, leave it at 0.


   /*-----------------------------------------------------------.
  /                       LumaSharpen settings                  /
  '-----------------------------------------------------------*/
// -- Sharpening --
#define sharp_strength 2.00   // [0.10 to 3.00] Strength of the sharpening
#define sharp_clamp    0.035  // [0.000 to 1.000] Limits maximum amount of sharpening a pixel recieves - Default is 0.035


// -- Advanced sharpening settings --
#define pattern 4        // [1|2|3|4] Choose a sample pattern. 1 = Fast, 2 = Normal, 3 = Wider, 4 = Pyramid shaped.
#define offset_bias 1.0  // [0.0 to 6.0] Offset bias adjusts the radius of the sampling pattern.
                         // I designed the pattern for offset_bias 1.0, but feel free to experiment.
                           
// -- Debug sharpening settings --
#define show_sharpen 0   // [0 or 1] Visualize the strength of the sharpen (multiplied by 4 to see it better)


   /*-----------------------------------------------------------.
  /                       Bloom settings                        /
  '-----------------------------------------------------------*/
#define BloomThreshold 20.25 //[0.00 to 50.00] Threshold for what is a bright light (that causes bloom) and what isn't.
#define BloomPower 1.446     //[0.0000 to 8.0000] Strength of the bloom
#define BloomWidth 0.0142    //[0.0000 to 1.0000] Width of the bloom


   /*-----------------------------------------------------------.
  /                        HDR settings                         /
  '-----------------------------------------------------------*/
#define HDRPower 1.30  //[0.0 to 8.0] Strangely lowering this makes the image brighter
#define radius2  0.87  //[0.0 to 8.0] Raising this seems to make the effect stronger and also brighter


   /*-----------------------------------------------------------.
  /                      TECHNICOLOR settings                   /
  '-----------------------------------------------------------*/
#define TechniAmount 0.11        //[0.0 to 1.0]
#define TechniPower  2.8         //[0.0 to 8.0]
#define redNegativeAmount   0.88 //[0.0 to 1.0]
#define greenNegativeAmount 0.88 //[0.0 to 1.0]
#define blueNegativeAmount  0.88 //[0.0 to 1.0]


   /*-----------------------------------------------------------.
  /                      Cineon DPX settings                    /
  '-----------------------------------------------------------*/
#define Red   8.0  //[1.0 to 15.0]
#define Green 8.0  //[1.0 to 15.0]
#define Blue  8.0  //[1.0 to 15.0]


#define ColorGamma    2.5  //[0.1 to 2.5] Adjusts the colorfulness of the effect in a manner similar to Vibrance. 1.0 is neutral.
#define DPXSaturation 3.0  //[0.0 to 8.0] Adjust saturation of the effect. 1.0 is neutral.


#define RedC   0.36  //[0.6 to 0.2]
#define GreenC 0.36  //[0.6 to 0.2]
#define BlueC  0.34  //[0.6 to 0.2]


#define Blend 0.2    //[0.0 to 0.1] How strong the effect should be.


   /*-----------------------------------------------------------.
  /                      Lift Gamma Gain settings               /
  '-----------------------------------------------------------*/
#define RGB_Lift  float3(1.000, 1.000, 1.000)  //[0.000 to 2.000] Adjust shadows for Red, Green and Blue
#define RGB_Gamma float3(1.000, 1.000, 1.000)  //[0.000 to 2.000] Adjust midtones for Red, Green and Blue
#define RGB_Gain  float3(1.000, 1.000, 1.300)  //[0.000 to 2.000] Adjust highlights for Red, Green and Blue


   /*-----------------------------------------------------------.
  /                        Tonemap settings                     /
  '-----------------------------------------------------------*/
#define Gamma 1.00        //[0.00 to 2.00] Adjust midtones


#define Exposure 0.25    //[-1.00 to 1.00] Adjust exposure


#define Saturation 0.00  //[-1.00 to 1.00] Adjust saturation


#define Bleach 0.00      //[0.00 to 1.00] Brightens the shadows and fades the colors


#define Defog 0.000  //[0.00 to 1.00] How much of the color tint to remove
#define FogColor float3(0.00, 0.00, 2.55) //[0.00 to 1.00, 0.00 to 1.00, 0.00 to 1.00] What color to remove - default is blue


   /*-----------------------------------------------------------.
  /                       Vibrance settings                     /
  '-----------------------------------------------------------*/
#define Vibrance -0.20 //[-1.0 to 1.0] Intelligently saturates (or desaturates if you use negative values) the pixels depending on their original saturation.


   /*-----------------------------------------------------------.
  /                        Curves settings                      /
  '-----------------------------------------------------------*/
#define Curves_contrast 0.40 //[-1.0 to 1.0] The amount of contrast you want


// -- Advanced curve settings --
#define Curves_formula 7      //[1|2|3|4|5|6|7] The constrast s-curve you want to use. 


   /*-----------------------------------------------------------.
  /                         Sepia settings                      /
  '-----------------------------------------------------------*/
#define ColorTone float3(1.40, 1.10, 0.90) //[0.00 to 1.00, 0.00 to 1.00, 0.00 to 1.00] What color to tint the image
#define GreyPower  0.11                    //[0.0 to 1.0] How much desaturate the image before tinting it
#define SepiaPower 0.58                    //[0.0 to 1.0] How much to tint the image


   /*-----------------------------------------------------------.
  /                       Vignette settings                     /
  '-----------------------------------------------------------*/
#define VignetteRadius 1.00   //[-1.00 to 3.00] lower values = stronger radial effect from center
#define VignetteAmount -1.00  //[-2.00 to 1.00] Strength of black. -2.00 = Max Black, 1.00 = Max White.
#define VignetteSlope 8       //[1 to 16] How far away from the center the change should start to really grow strong (odd numbers cause a larger fps drop than even numbers)
#define VignetteCenter float2(0.500, 0.500)  //[0.00 to 1.00] Center of effect.


   /*-----------------------------------------------------------.
  /                        Dither settings                      /
  '-----------------------------------------------------------*/
//No settings yet, beyond switching it on or off in the top section.


//Note that the checkerboard pattern used by Dither, makes an image harder to compress.
//This can make your screenshots and video recordings take up more space.


   /*-----------------------------------------------------------.
  /                     Splitscreen settings                    /
  '-----------------------------------------------------------*/
#define splitscreen_mode 3  //[1|2|3|4|5]  1 = Vertical 50/50 split, 2 = Vertical 25/50/25 split, 3 = Vertical 50/50 angled split, 4 = Horizontal 50/50 split, 5 = Horizontal 25/50/25 split

Kapalı
http://s9.postimage.org/r24sej5kt/vampire_2013_01_14_19_20_43_60.png
Açık
http://s9.postimage.org/o4ceyknb1/vampire_2013_01_14_19_20_45_51.png

Kapalı
http://s9.postimage.org/oyyyklv5p/vampire_2013_01_14_19_23_01_31.png
Açık
http://s9.postimage.org/ip3oxlvr1/vampire_2013_01_14_19_23_02_78.png

Kapalı
http://s9.postimage.org/nrpm64uf1/vampire_2013_01_14_19_24_15_87.png
Açık
http://s9.postimage.org/54m3pyupp/vampire_2013_01_14_19_24_17_74.png

Kapalı
http://s9.postimage.org/58fx68071/vampire_2013_01_14_19_34_07_93.png
Açık
http://s9.postimage.org/i52g056nx/vampire_2013_01_14_19_34_09_51.png

Kapalı
http://s9.postimage.org/cjg0w35z1/vampire_2013_01_14_19_42_24_90.png
Açık
http://s9.postimage.org/8pmkmxon1/vampire_2013_01_14_19_42_25_72.png
 

Ben Kenobi

Dekan
Katılım
6 Kasım 2011
Mesajlar
7,336
Reaksiyon puanı
3,155
Puanları
113
Left 4 Dead 2
mat_postprocess_enable 0

Kod:
   /*-----------------------------------------------------------.
  /                      Choose effects                         /
  '-----------------------------------------------------------*/


// Set to 1 for ON or 0 for OFF
#define USE_SMAA_ANTIALIASING 1 //[0 or 1] SMAA Anti-aliasing : Smoothens jagged lines.
#define USE_LUMASHARPEN   1 //[0 or 1] LumaSharpen : Also sharpens the antialiased edges which makes them less smooth - I'm working on fixing that.
#define USE_BLOOM         0 //[0 or 1] Bloom : Makes bright lights bleed their light into their surroundings (relatively high performance cost)
#define USE_HDR           0 //[0 or 1] HDR : Not actual HDR - It just tries to mimic an HDR look (relatively high performance cost)
#define USE_TECHNICOLOR   0 //[0 or 1] TECHNICOLOR : Attempts to mimic the look of an old movie using the Technicolor three-strip color process (Techicolor Process 4)
#define USE_DPX           0 //[0 or 1] Cineon DPX : Should make the image look like it's been converted to DXP Cineon - basically it's another movie-like look similar to technicolor.
#define USE_LIFTGAMMAGAIN 1 //[0 or 1] Lift Gamma Gain : Adjust brightness and color of shadows, midtones and highlights (avoids clipping)
#define USE_TONEMAP       0 //[0 or 1] Tonemap : Adjust gamma, exposure, saturation, bleach and defog. (may cause clipping)
#define USE_VIBRANCE      1 //[0 or 1] Vibrance : Intelligently saturates (or desaturates if you use negative values) the pixels depending on their original saturation.
#define USE_CURVES        1 //[0 or 1] Curves : Contrast adjustments using S-curves.
#define USE_SEPIA         0 //[0 or 1] Sepia : Sepia tones the image.
#define USE_VIGNETTE      0 //[0 or 1] Vignette : Darkens the edges of the image to make it look more like it was shot with a camera lens. May cause banding artifacts.
#define USE_DITHER        0 //[0 or 1] Dither : Applies dithering to simulate more colors than your monitor can display. This lessens banding artifacts (mostly caused by Vignette)
#define USE_SPLITSCREEN   0 //[0 or 1] Splitscreen : Enables the before-and-after splitscreen comparison mode.


   /*-----------------------------------------------------------.
  /                  SMAA Anti-aliasing settings                /
  '-----------------------------------------------------------*/


#define SMAA_THRESHOLD 0.12           // [0.05 to 0.20] Edge detection threshold
#define SMAA_MAX_SEARCH_STEPS 16      // [0 to 98] Determines the radius SMAA will search for aliased edges
#define SMAA_MAX_SEARCH_STEPS_DIAG 6  // [0 to 16] Determines the radius SMAA will search for diagonal aliased edges
#define SMAA_CORNER_ROUNDING 0        // [0 to 100] Determines the percent of antialiasing to apply to corners.


// -- Advanced SMAA settings --
#define COLOR_EDGE_DETECTION 1        // [0 or 1] 1 Enables color edge detection (slower but slightly more acurate) - 0 uses luma edge detection (faster)
#define SMAA_DIRECTX9_LINEAR_BLEND 0  // [0 or 1] Using DX9 HARDWARE? (software version doesn't matter) if so this needs to be 1 - If not, leave it at 0.


   /*-----------------------------------------------------------.
  /                       LumaSharpen settings                  /
  '-----------------------------------------------------------*/
// -- Sharpening --
#define sharp_strength 2.00   // [0.10 to 3.00] Strength of the sharpening
#define sharp_clamp    0.035  // [0.000 to 1.000] Limits maximum amount of sharpening a pixel recieves - Default is 0.035


// -- Advanced sharpening settings --
#define pattern 2        // [1|2|3|4] Choose a sample pattern. 1 = Fast, 2 = Normal, 3 = Wider, 4 = Pyramid shaped.
#define offset_bias 1.0  // [0.0 to 6.0] Offset bias adjusts the radius of the sampling pattern.
                         // I designed the pattern for offset_bias 1.0, but feel free to experiment.
                           
// -- Debug sharpening settings --
#define show_sharpen 0   // [0 or 1] Visualize the strength of the sharpen (multiplied by 4 to see it better)


   /*-----------------------------------------------------------.
  /                       Bloom settings                        /
  '-----------------------------------------------------------*/
#define BloomThreshold 20.25 //[0.00 to 50.00] Threshold for what is a bright light (that causes bloom) and what isn't.
#define BloomPower 1.446     //[0.0000 to 8.0000] Strength of the bloom
#define BloomWidth 0.0142    //[0.0000 to 1.0000] Width of the bloom


   /*-----------------------------------------------------------.
  /                        HDR settings                         /
  '-----------------------------------------------------------*/
#define HDRPower 1.30  //[0.0 to 8.0] Strangely lowering this makes the image brighter
#define radius2  0.87  //[0.0 to 8.0] Raising this seems to make the effect stronger and also brighter


   /*-----------------------------------------------------------.
  /                      TECHNICOLOR settings                   /
  '-----------------------------------------------------------*/
#define TechniAmount 0.11        //[0.0 to 1.0]
#define TechniPower  2.8         //[0.0 to 8.0]
#define redNegativeAmount   0.88 //[0.0 to 1.0]
#define greenNegativeAmount 0.88 //[0.0 to 1.0]
#define blueNegativeAmount  0.88 //[0.0 to 1.0]


   /*-----------------------------------------------------------.
  /                      Cineon DPX settings                    /
  '-----------------------------------------------------------*/
#define Red   8.0  //[1.0 to 15.0]
#define Green 8.0  //[1.0 to 15.0]
#define Blue  8.0  //[1.0 to 15.0]


#define ColorGamma    2.5  //[0.1 to 2.5] Adjusts the colorfulness of the effect in a manner similar to Vibrance. 1.0 is neutral.
#define DPXSaturation 3.0  //[0.0 to 8.0] Adjust saturation of the effect. 1.0 is neutral.


#define RedC   0.36  //[0.6 to 0.2]
#define GreenC 0.36  //[0.6 to 0.2]
#define BlueC  0.34  //[0.6 to 0.2]


#define Blend 0.2    //[0.0 to 0.1] How strong the effect should be.


   /*-----------------------------------------------------------.
  /                      Lift Gamma Gain settings               /
  '-----------------------------------------------------------*/
#define RGB_Lift  float3(1.000, 1.000, 1.000)  //[0.000 to 2.000] Adjust shadows for Red, Green and Blue
#define RGB_Gamma float3(1.000, 1.000, 1.000)  //[0.000 to 2.000] Adjust midtones for Red, Green and Blue
#define RGB_Gain  float3(1.000, 1.000, 1.150)  //[0.000 to 2.000] Adjust highlights for Red, Green and Blue


   /*-----------------------------------------------------------.
  /                        Tonemap settings                     /
  '-----------------------------------------------------------*/
#define Gamma 1.00        //[0.00 to 2.00] Adjust midtones


#define Exposure 0.00    //[-1.00 to 1.00] Adjust exposure


#define Saturation 0.00  //[-1.00 to 1.00] Adjust saturation


#define Bleach 1.00      //[0.00 to 1.00] Brightens the shadows and fades the colors


#define Defog 0.000  //[0.00 to 1.00] How much of the color tint to remove
#define FogColor float3(0.00, 0.00, 2.55) //[0.00 to 1.00, 0.00 to 1.00, 0.00 to 1.00] What color to remove - default is blue


   /*-----------------------------------------------------------.
  /                       Vibrance settings                     /
  '-----------------------------------------------------------*/
#define Vibrance -0.25 //[-1.0 to 1.0] Intelligently saturates (or desaturates if you use negative values) the pixels depending on their original saturation.


   /*-----------------------------------------------------------.
  /                        Curves settings                      /
  '-----------------------------------------------------------*/
#define Curves_contrast 0.33 //[-1.0 to 1.0] The amount of contrast you want


// -- Advanced curve settings --
#define Curves_formula 7      //[1|2|3|4|5|6|7] The constrast s-curve you want to use. 


   /*-----------------------------------------------------------.
  /                         Sepia settings                      /
  '-----------------------------------------------------------*/
#define ColorTone float3(1.40, 1.10, 0.90) //[0.00 to 1.00, 0.00 to 1.00, 0.00 to 1.00] What color to tint the image
#define GreyPower  0.11                    //[0.0 to 1.0] How much desaturate the image before tinting it
#define SepiaPower 0.58                    //[0.0 to 1.0] How much to tint the image


   /*-----------------------------------------------------------.
  /                       Vignette settings                     /
  '-----------------------------------------------------------*/
#define VignetteRadius 1.00   //[-1.00 to 3.00] lower values = stronger radial effect from center
#define VignetteAmount -1.00  //[-2.00 to 1.00] Strength of black. -2.00 = Max Black, 1.00 = Max White.
#define VignetteSlope 8       //[1 to 16] How far away from the center the change should start to really grow strong (odd numbers cause a larger fps drop than even numbers)
#define VignetteCenter float2(0.500, 0.500)  //[0.00 to 1.00] Center of effect.


   /*-----------------------------------------------------------.
  /                        Dither settings                      /
  '-----------------------------------------------------------*/
//No settings yet, beyond switching it on or off in the top section.


//Note that the checkerboard pattern used by Dither, makes an image harder to compress.
//This can make your screenshots and video recordings take up more space.


   /*-----------------------------------------------------------.
  /                     Splitscreen settings                    /
  '-----------------------------------------------------------*/
#define splitscreen_mode 3  //[1|2|3|4|5]  1 = Vertical 50/50 split, 2 = Vertical 25/50/25 split, 3 = Vertical 50/50 angled split, 4 = Horizontal 50/50 split, 5 = Horizontal 25/50/25 split
Kapalı
http://s2.postimage.org/b2zmrchhz/hl2_2013_01_14_22_00_47_02.png
Açık
http://s2.postimage.org/nb8pokzvb/hl2_2013_01_14_22_00_48_40.png

Kapalı
http://s2.postimage.org/e8otvaphz/hl2_2013_01_14_22_03_55_24.png
Açık
http://s2.postimage.org/3zwcph1g7/hl2_2013_01_14_22_03_57_37.png

Kapalı
http://s2.postimage.org/kq7qeszvb/hl2_2013_01_14_22_22_20_65.png
Açık
http://s2.postimage.org/xivueqbh3/hl2_2013_01_14_22_22_22_17.png

Kapalı
http://s2.postimage.org/5mlkapdhz/hl2_2013_01_14_22_24_18_76.png
Açık
http://s2.postimage.org/u724z693r/hl2_2013_01_14_22_24_20_65.png

Kapalı
http://s14.postimage.org/ebqyefren/hl2_2013_01_14_22_45_32_89.png
Açık
http://s14.postimage.org/uqkvr09dr/hl2_2013_01_14_22_45_34_52.png
 

rozabay

Dekan
Katılım
4 Nisan 2009
Mesajlar
7,113
Reaksiyon puanı
34
Puanları
48
Left 4 Dead 2
mat_postprocess_enable 0

Kod:
   /*-----------------------------------------------------------.
  /                      Choose effects                         /
  '-----------------------------------------------------------*/


// Set to 1 for ON or 0 for OFF
#define USE_SMAA_ANTIALIASING 1 //[0 or 1] SMAA Anti-aliasing : Smoothens jagged lines.
#define USE_LUMASHARPEN   1 //[0 or 1] LumaSharpen : Also sharpens the antialiased edges which makes them less smooth - I'm working on fixing that.
#define USE_BLOOM         0 //[0 or 1] Bloom : Makes bright lights bleed their light into their surroundings (relatively high performance cost)
#define USE_HDR           0 //[0 or 1] HDR : Not actual HDR - It just tries to mimic an HDR look (relatively high performance cost)
#define USE_TECHNICOLOR   0 //[0 or 1] TECHNICOLOR : Attempts to mimic the look of an old movie using the Technicolor three-strip color process (Techicolor Process 4)
#define USE_DPX           0 //[0 or 1] Cineon DPX : Should make the image look like it's been converted to DXP Cineon - basically it's another movie-like look similar to technicolor.
#define USE_LIFTGAMMAGAIN 1 //[0 or 1] Lift Gamma Gain : Adjust brightness and color of shadows, midtones and highlights (avoids clipping)
#define USE_TONEMAP       0 //[0 or 1] Tonemap : Adjust gamma, exposure, saturation, bleach and defog. (may cause clipping)
#define USE_VIBRANCE      1 //[0 or 1] Vibrance : Intelligently saturates (or desaturates if you use negative values) the pixels depending on their original saturation.
#define USE_CURVES        1 //[0 or 1] Curves : Contrast adjustments using S-curves.
#define USE_SEPIA         0 //[0 or 1] Sepia : Sepia tones the image.
#define USE_VIGNETTE      0 //[0 or 1] Vignette : Darkens the edges of the image to make it look more like it was shot with a camera lens. May cause banding artifacts.
#define USE_DITHER        0 //[0 or 1] Dither : Applies dithering to simulate more colors than your monitor can display. This lessens banding artifacts (mostly caused by Vignette)
#define USE_SPLITSCREEN   0 //[0 or 1] Splitscreen : Enables the before-and-after splitscreen comparison mode.


   /*-----------------------------------------------------------.
  /                  SMAA Anti-aliasing settings                /
  '-----------------------------------------------------------*/


#define SMAA_THRESHOLD 0.12           // [0.05 to 0.20] Edge detection threshold
#define SMAA_MAX_SEARCH_STEPS 16      // [0 to 98] Determines the radius SMAA will search for aliased edges
#define SMAA_MAX_SEARCH_STEPS_DIAG 6  // [0 to 16] Determines the radius SMAA will search for diagonal aliased edges
#define SMAA_CORNER_ROUNDING 0        // [0 to 100] Determines the percent of antialiasing to apply to corners.


// -- Advanced SMAA settings --
#define COLOR_EDGE_DETECTION 1        // [0 or 1] 1 Enables color edge detection (slower but slightly more acurate) - 0 uses luma edge detection (faster)
#define SMAA_DIRECTX9_LINEAR_BLEND 0  // [0 or 1] Using DX9 HARDWARE? (software version doesn't matter) if so this needs to be 1 - If not, leave it at 0.


   /*-----------------------------------------------------------.
  /                       LumaSharpen settings                  /
  '-----------------------------------------------------------*/
// -- Sharpening --
#define sharp_strength 2.00   // [0.10 to 3.00] Strength of the sharpening
#define sharp_clamp    0.035  // [0.000 to 1.000] Limits maximum amount of sharpening a pixel recieves - Default is 0.035


// -- Advanced sharpening settings --
#define pattern 2        // [1|2|3|4] Choose a sample pattern. 1 = Fast, 2 = Normal, 3 = Wider, 4 = Pyramid shaped.
#define offset_bias 1.0  // [0.0 to 6.0] Offset bias adjusts the radius of the sampling pattern.
                         // I designed the pattern for offset_bias 1.0, but feel free to experiment.
                           
// -- Debug sharpening settings --
#define show_sharpen 0   // [0 or 1] Visualize the strength of the sharpen (multiplied by 4 to see it better)


   /*-----------------------------------------------------------.
  /                       Bloom settings                        /
  '-----------------------------------------------------------*/
#define BloomThreshold 20.25 //[0.00 to 50.00] Threshold for what is a bright light (that causes bloom) and what isn't.
#define BloomPower 1.446     //[0.0000 to 8.0000] Strength of the bloom
#define BloomWidth 0.0142    //[0.0000 to 1.0000] Width of the bloom


   /*-----------------------------------------------------------.
  /                        HDR settings                         /
  '-----------------------------------------------------------*/
#define HDRPower 1.30  //[0.0 to 8.0] Strangely lowering this makes the image brighter
#define radius2  0.87  //[0.0 to 8.0] Raising this seems to make the effect stronger and also brighter


   /*-----------------------------------------------------------.
  /                      TECHNICOLOR settings                   /
  '-----------------------------------------------------------*/
#define TechniAmount 0.11        //[0.0 to 1.0]
#define TechniPower  2.8         //[0.0 to 8.0]
#define redNegativeAmount   0.88 //[0.0 to 1.0]
#define greenNegativeAmount 0.88 //[0.0 to 1.0]
#define blueNegativeAmount  0.88 //[0.0 to 1.0]


   /*-----------------------------------------------------------.
  /                      Cineon DPX settings                    /
  '-----------------------------------------------------------*/
#define Red   8.0  //[1.0 to 15.0]
#define Green 8.0  //[1.0 to 15.0]
#define Blue  8.0  //[1.0 to 15.0]


#define ColorGamma    2.5  //[0.1 to 2.5] Adjusts the colorfulness of the effect in a manner similar to Vibrance. 1.0 is neutral.
#define DPXSaturation 3.0  //[0.0 to 8.0] Adjust saturation of the effect. 1.0 is neutral.


#define RedC   0.36  //[0.6 to 0.2]
#define GreenC 0.36  //[0.6 to 0.2]
#define BlueC  0.34  //[0.6 to 0.2]


#define Blend 0.2    //[0.0 to 0.1] How strong the effect should be.


   /*-----------------------------------------------------------.
  /                      Lift Gamma Gain settings               /
  '-----------------------------------------------------------*/
#define RGB_Lift  float3(1.000, 1.000, 1.000)  //[0.000 to 2.000] Adjust shadows for Red, Green and Blue
#define RGB_Gamma float3(1.000, 1.000, 1.000)  //[0.000 to 2.000] Adjust midtones for Red, Green and Blue
#define RGB_Gain  float3(1.000, 1.000, 1.150)  //[0.000 to 2.000] Adjust highlights for Red, Green and Blue


   /*-----------------------------------------------------------.
  /                        Tonemap settings                     /
  '-----------------------------------------------------------*/
#define Gamma 1.00        //[0.00 to 2.00] Adjust midtones


#define Exposure 0.00    //[-1.00 to 1.00] Adjust exposure


#define Saturation 0.00  //[-1.00 to 1.00] Adjust saturation


#define Bleach 1.00      //[0.00 to 1.00] Brightens the shadows and fades the colors


#define Defog 0.000  //[0.00 to 1.00] How much of the color tint to remove
#define FogColor float3(0.00, 0.00, 2.55) //[0.00 to 1.00, 0.00 to 1.00, 0.00 to 1.00] What color to remove - default is blue


   /*-----------------------------------------------------------.
  /                       Vibrance settings                     /
  '-----------------------------------------------------------*/
#define Vibrance -0.25 //[-1.0 to 1.0] Intelligently saturates (or desaturates if you use negative values) the pixels depending on their original saturation.


   /*-----------------------------------------------------------.
  /                        Curves settings                      /
  '-----------------------------------------------------------*/
#define Curves_contrast 0.33 //[-1.0 to 1.0] The amount of contrast you want


// -- Advanced curve settings --
#define Curves_formula 7      //[1|2|3|4|5|6|7] The constrast s-curve you want to use. 


   /*-----------------------------------------------------------.
  /                         Sepia settings                      /
  '-----------------------------------------------------------*/
#define ColorTone float3(1.40, 1.10, 0.90) //[0.00 to 1.00, 0.00 to 1.00, 0.00 to 1.00] What color to tint the image
#define GreyPower  0.11                    //[0.0 to 1.0] How much desaturate the image before tinting it
#define SepiaPower 0.58                    //[0.0 to 1.0] How much to tint the image


   /*-----------------------------------------------------------.
  /                       Vignette settings                     /
  '-----------------------------------------------------------*/
#define VignetteRadius 1.00   //[-1.00 to 3.00] lower values = stronger radial effect from center
#define VignetteAmount -1.00  //[-2.00 to 1.00] Strength of black. -2.00 = Max Black, 1.00 = Max White.
#define VignetteSlope 8       //[1 to 16] How far away from the center the change should start to really grow strong (odd numbers cause a larger fps drop than even numbers)
#define VignetteCenter float2(0.500, 0.500)  //[0.00 to 1.00] Center of effect.


   /*-----------------------------------------------------------.
  /                        Dither settings                      /
  '-----------------------------------------------------------*/
//No settings yet, beyond switching it on or off in the top section.


//Note that the checkerboard pattern used by Dither, makes an image harder to compress.
//This can make your screenshots and video recordings take up more space.


   /*-----------------------------------------------------------.
  /                     Splitscreen settings                    /
  '-----------------------------------------------------------*/
#define splitscreen_mode 3  //[1|2|3|4|5]  1 = Vertical 50/50 split, 2 = Vertical 25/50/25 split, 3 = Vertical 50/50 angled split, 4 = Horizontal 50/50 split, 5 = Horizontal 25/50/25 split
Kapalı
http://s2.postimage.org/b2zmrchhz/hl2_2013_01_14_22_00_47_02.png
Açık
http://s2.postimage.org/nb8pokzvb/hl2_2013_01_14_22_00_48_40.png

Kapalı
http://s2.postimage.org/e8otvaphz/hl2_2013_01_14_22_03_55_24.png
Açık
http://s2.postimage.org/3zwcph1g7/hl2_2013_01_14_22_03_57_37.png

Kapalı
http://s2.postimage.org/kq7qeszvb/hl2_2013_01_14_22_22_20_65.png
Açık
http://s2.postimage.org/xivueqbh3/hl2_2013_01_14_22_22_22_17.png

Kapalı
http://s2.postimage.org/5mlkapdhz/hl2_2013_01_14_22_24_18_76.png
Açık
http://s2.postimage.org/u724z693r/hl2_2013_01_14_22_24_20_65.png

Kapalı
http://s14.postimage.org/ebqyefren/hl2_2013_01_14_22_45_32_89.png
Açık
http://s14.postimage.org/uqkvr09dr/hl2_2013_01_14_22_45_34_52.png

İlk resimdeki yağmur damlalarının düştüğü an kalite farkını daha iyi anlatıyor. Bilgisayar biraz daha iyi olsaydı bu programı kesinlikle denerdim.
 

Ben Kenobi

Dekan
Katılım
6 Kasım 2011
Mesajlar
7,336
Reaksiyon puanı
3,155
Puanları
113
İlk resimdeki yağmur damlalarının düştüğü an kalite farkını daha iyi anlatıyor. Bilgisayar biraz daha iyi olsaydı bu programı kesinlikle denerdim.

Buradaki kalite artışı sana bağlı.
Eğer yanlış ayar yaparsan daha kötü gözükebilir.

Benim taktik aynı.
Standart ayarlarda SMAA ile poligonlar arası tırtıklanmaları azalt.
1.00 2.00 arası Sharpen ile kaplamaları keskinleştir.
0.20 0.33 arası negatif Vibrance ile renkleri dinamik şekilde soldur.
Işıklardaki mavi gamayı 1.100 - 1.250 oranı arasında arttır.
0.20 - 0.40 arası Curves ile kontrastı arttır.
Eğer oyunda HDR yoksa Exposure ile 0.20 0.33 arası arttır.
Oyun bu ayarlardan sonra olması gerekenden daha fazla karanlık ya da aydınlıksa Gamma ile düzelt.

Bu aslında benim kendi zevkim.
Bu konuyu açmanın nedeni diğer arkadaşların da zevkini görmekti ama ilgi yok.
Kodları kullanmayı da öğreteyim.
En üstte Choose Effect kısmındaki kodlar 1 ya da 0 yani açık ya da kapalı olacak.
Diğer kısımlar da sırasıyla efektlerin ayarları, sadece açtıklarınızın ayarları ile ilgilenmelisiniz diğerlerine zaten gerek yok.

Oyunun performansını düşürse de en azından denemek lazım.
İçinizdeki sanatçıyı açığa çıkarıyor. :p
 

Ben Kenobi

Dekan
Katılım
6 Kasım 2011
Mesajlar
7,336
Reaksiyon puanı
3,155
Puanları
113
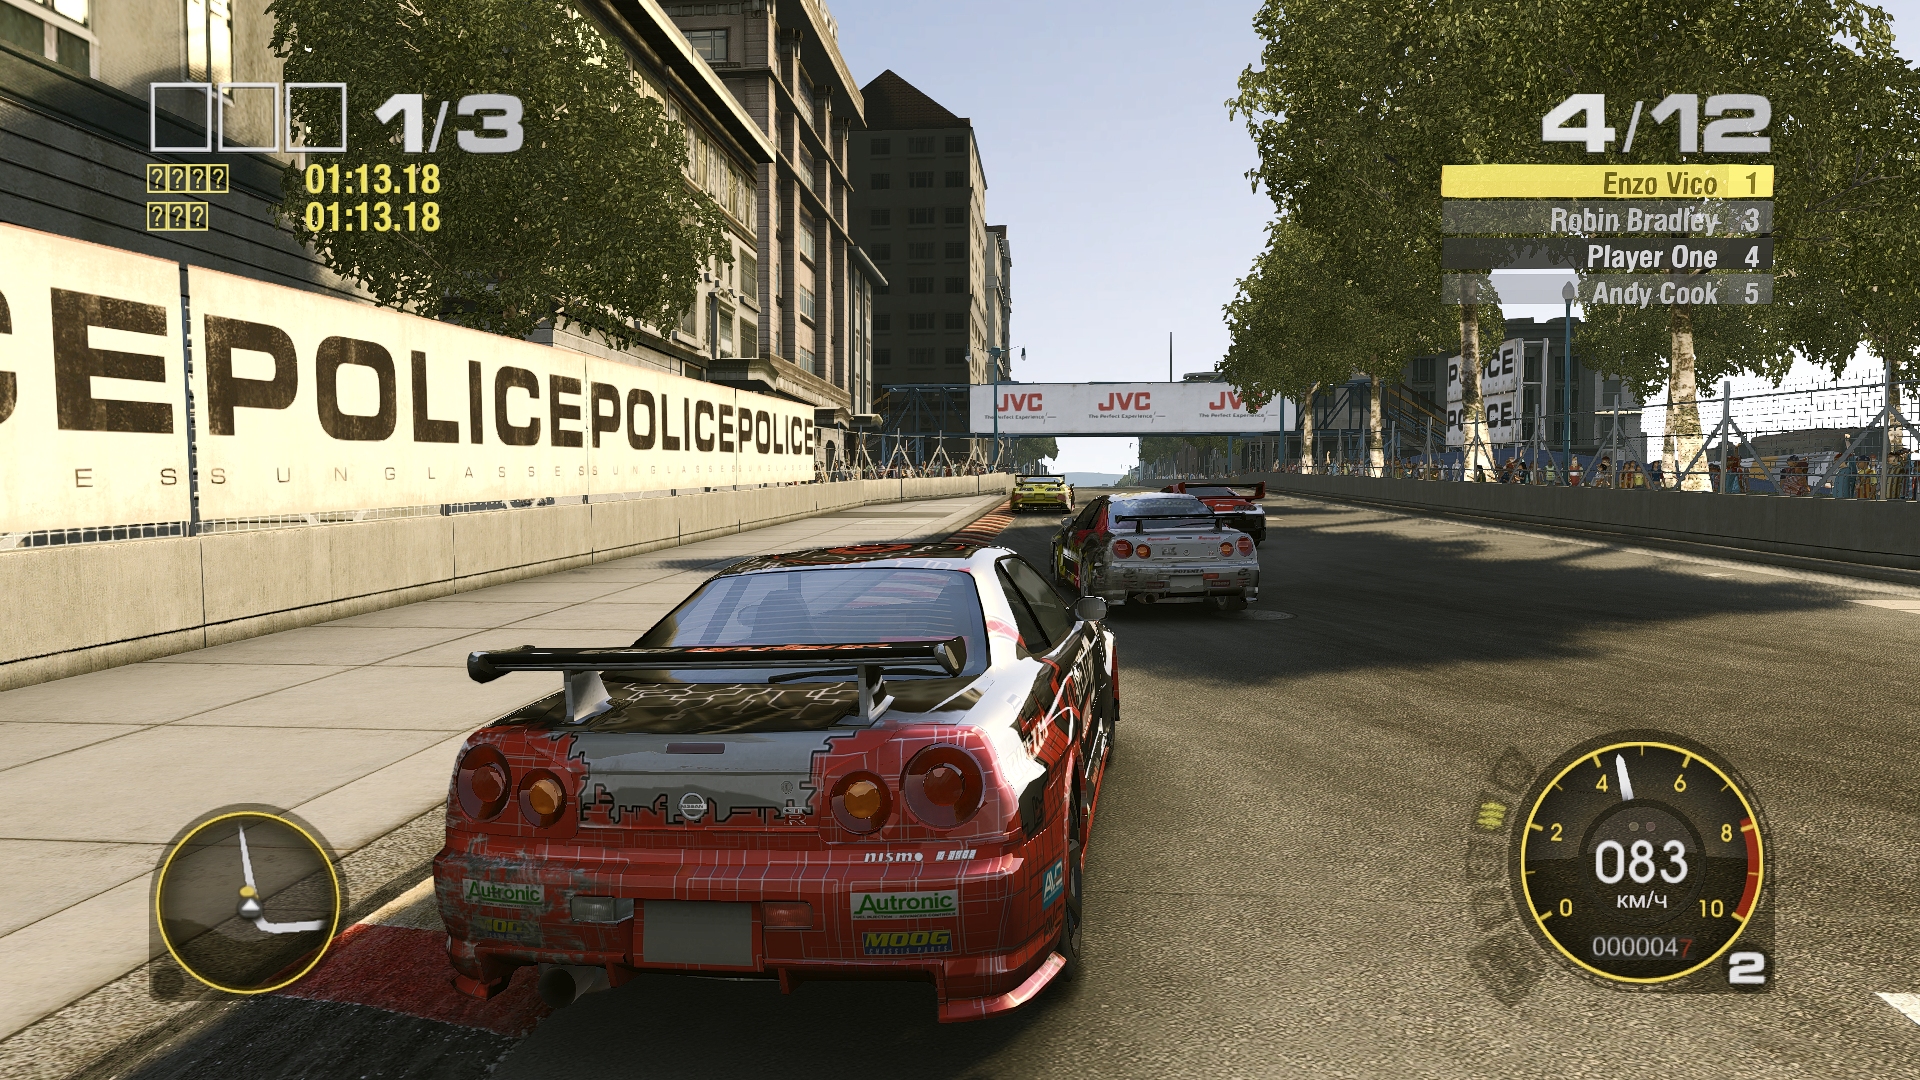
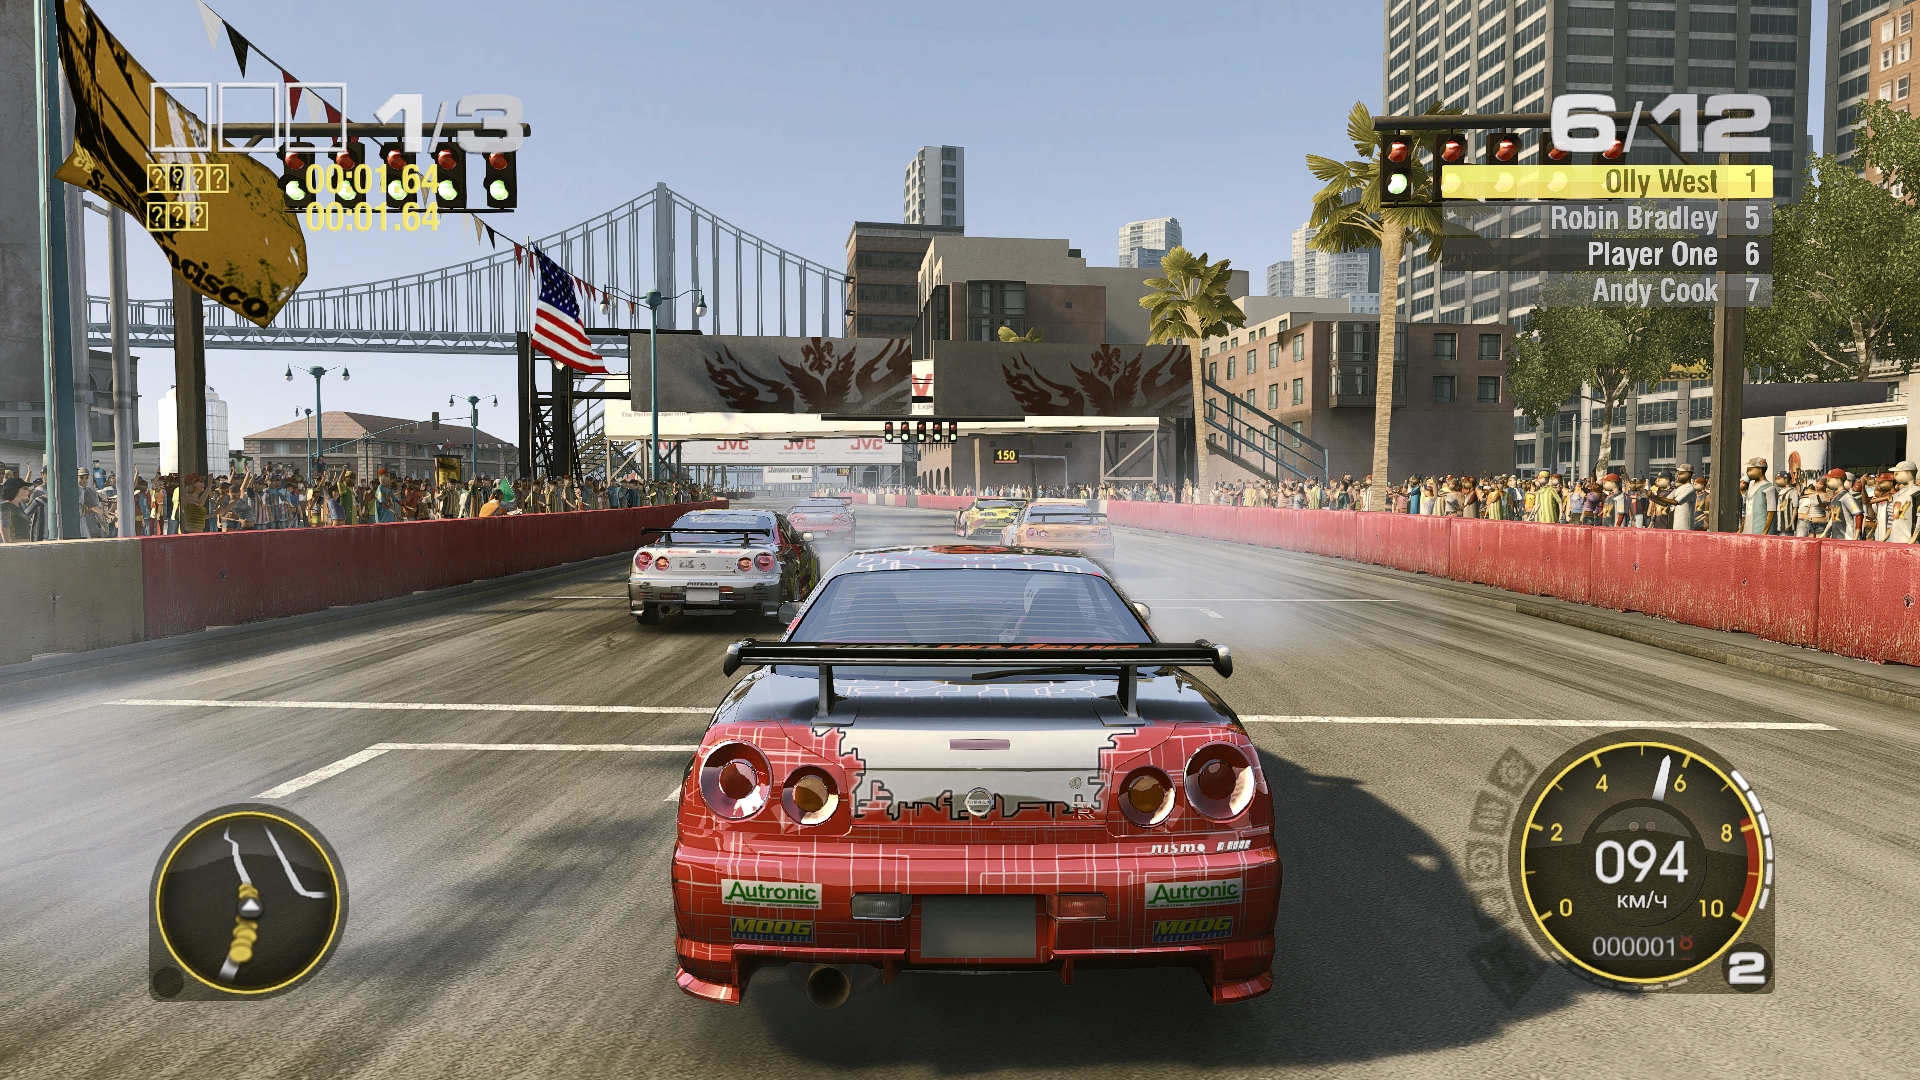
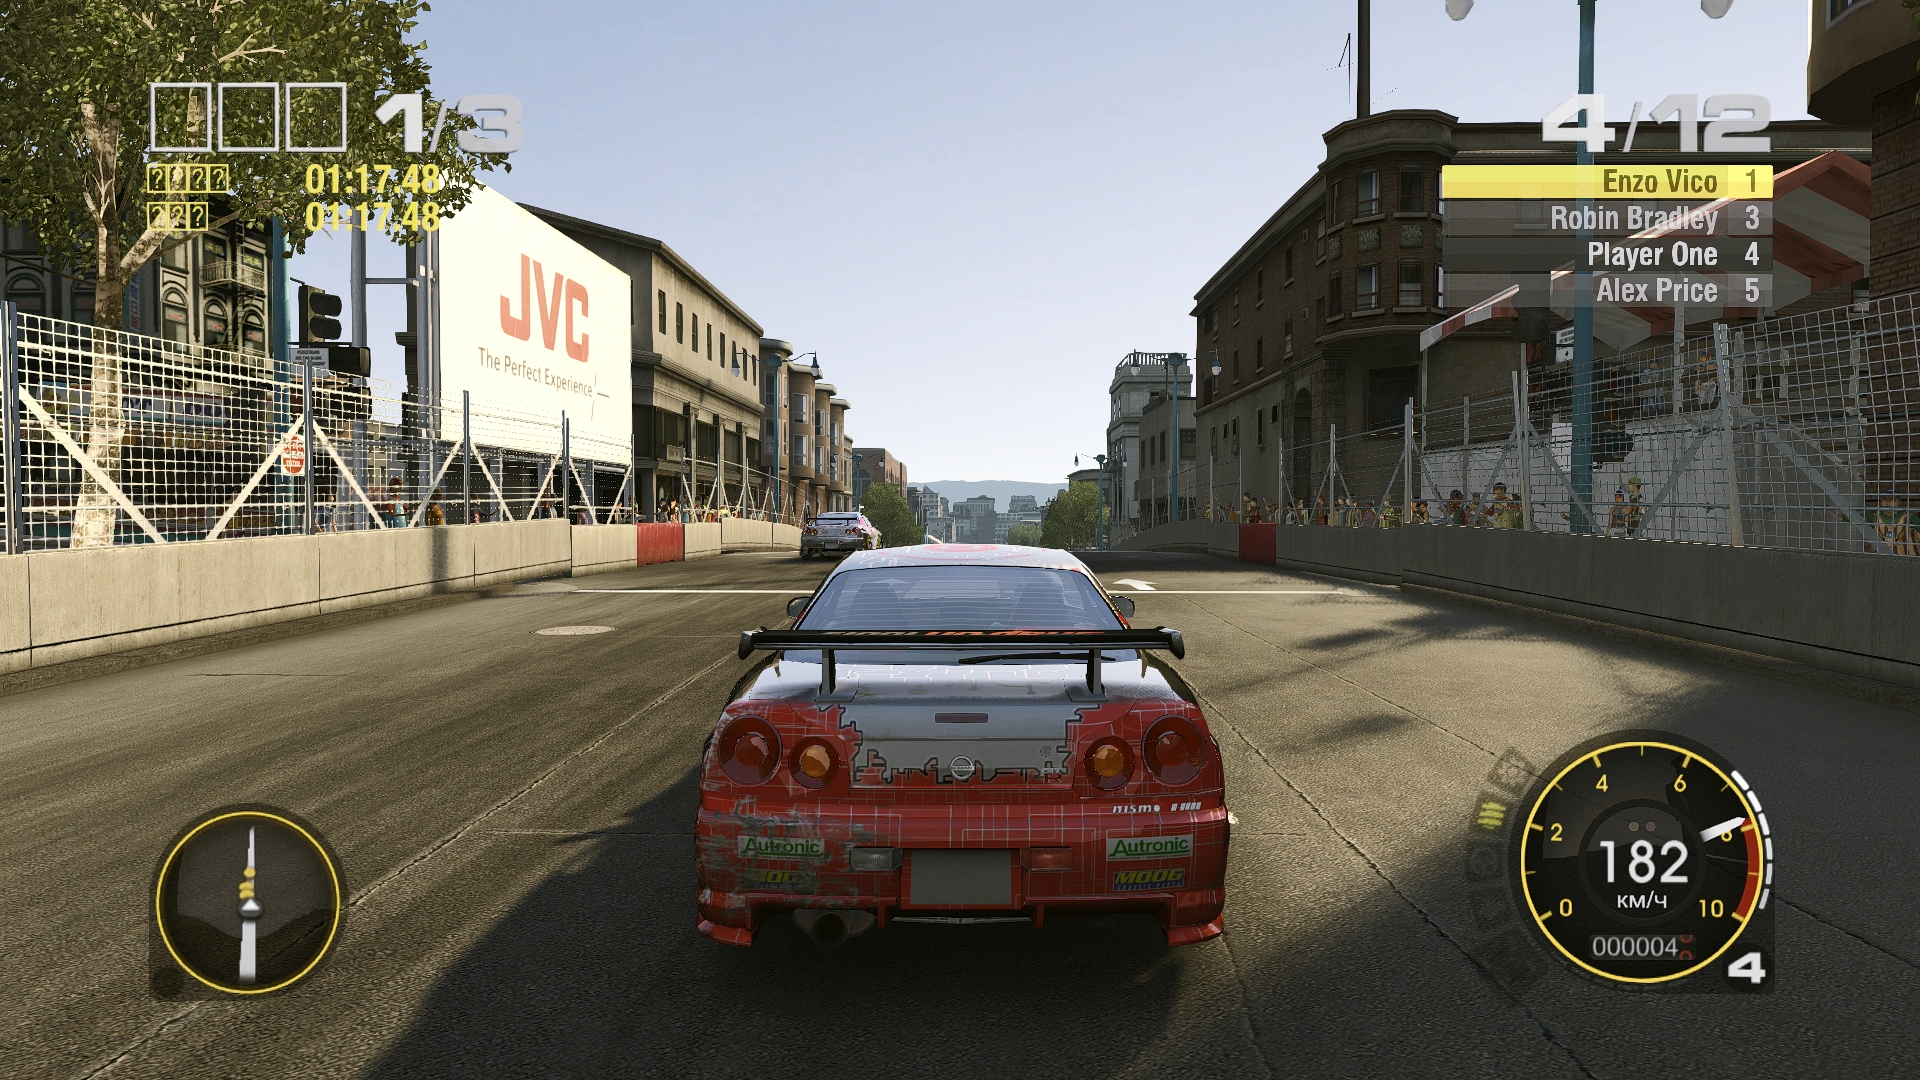
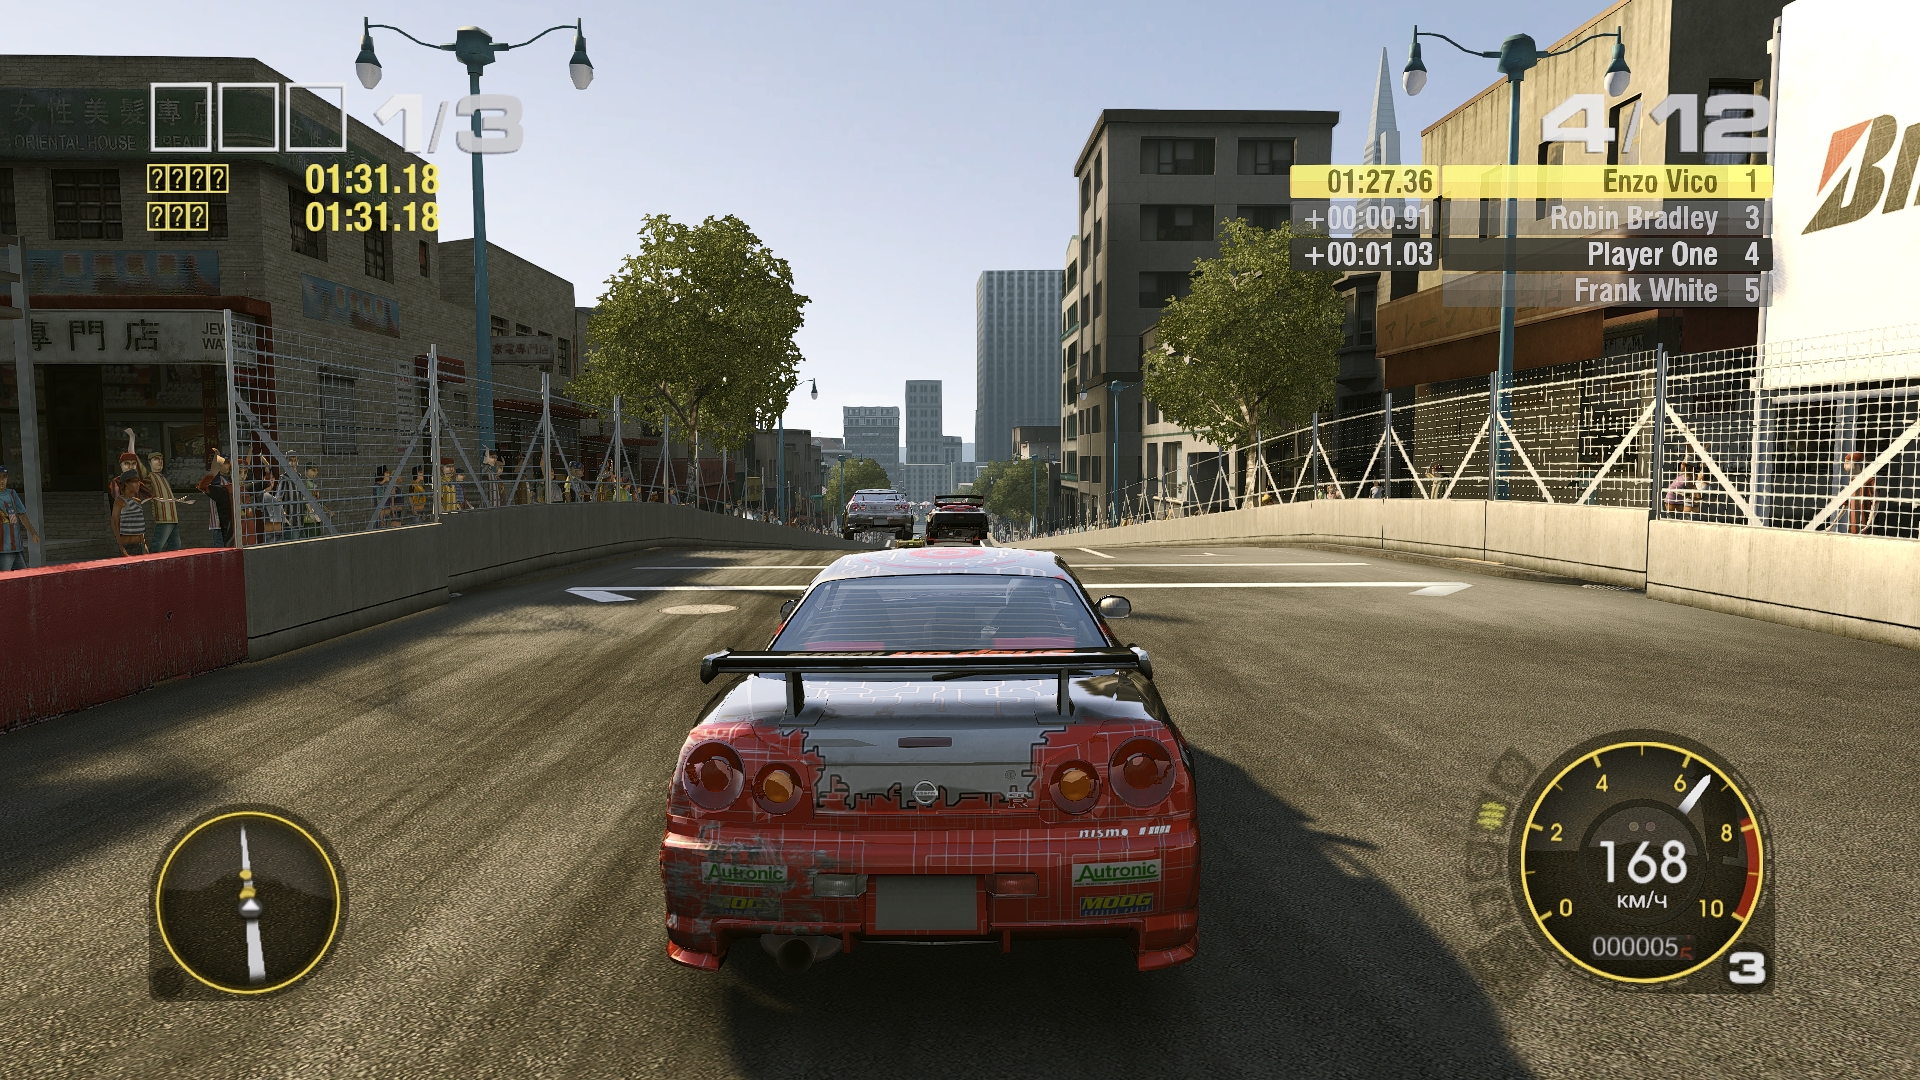
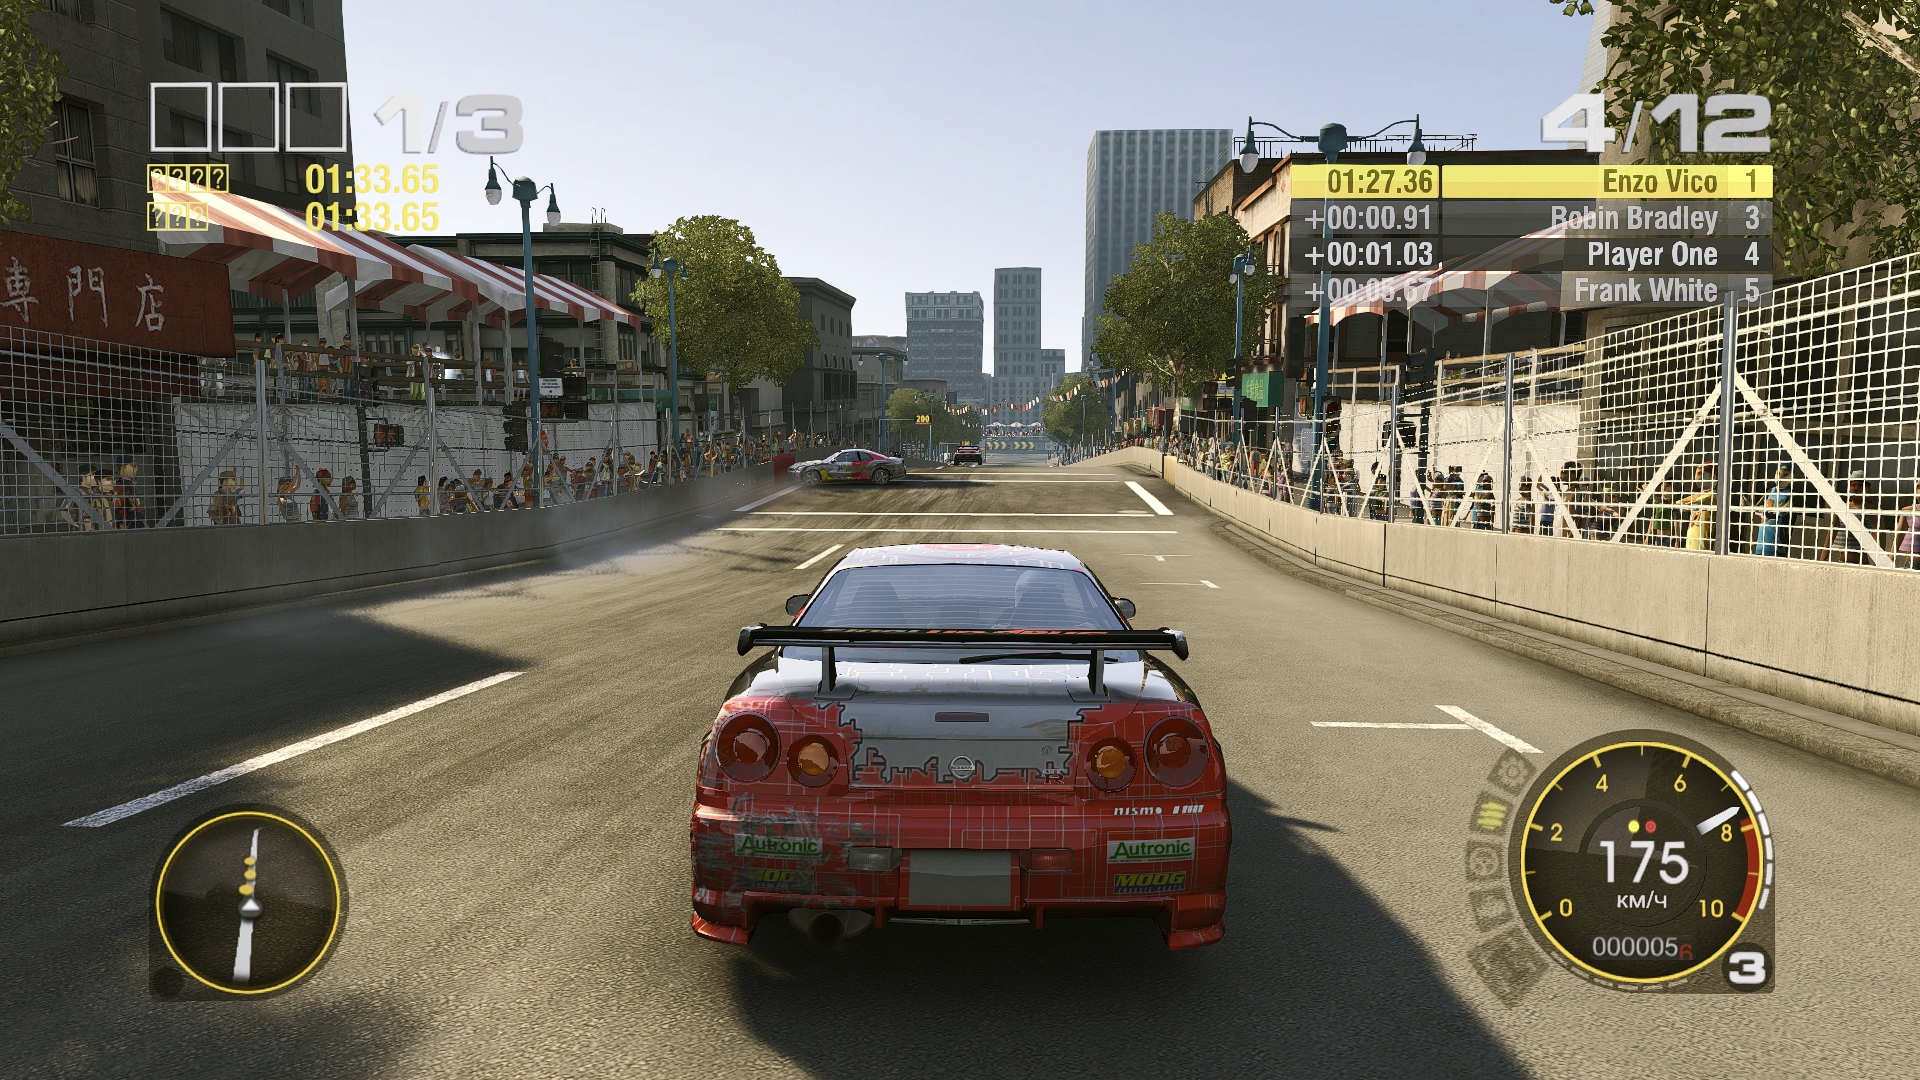
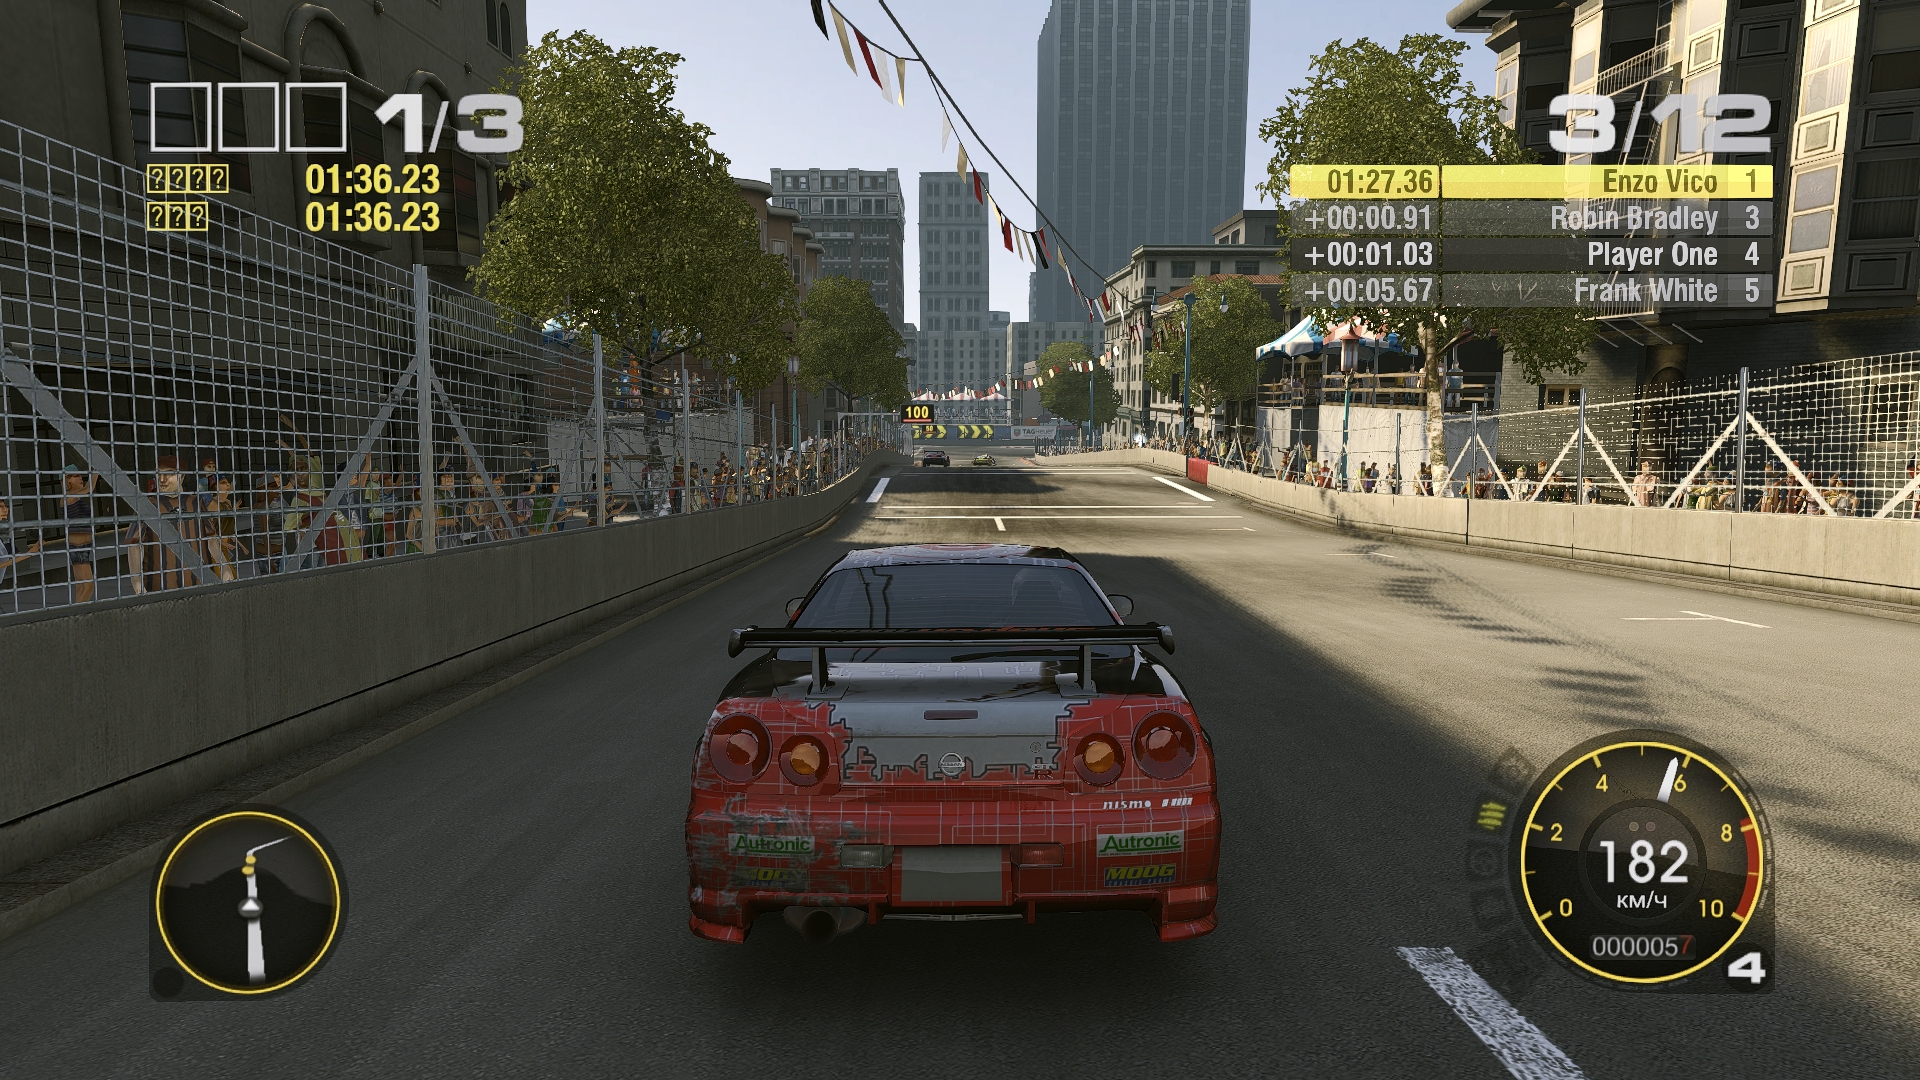
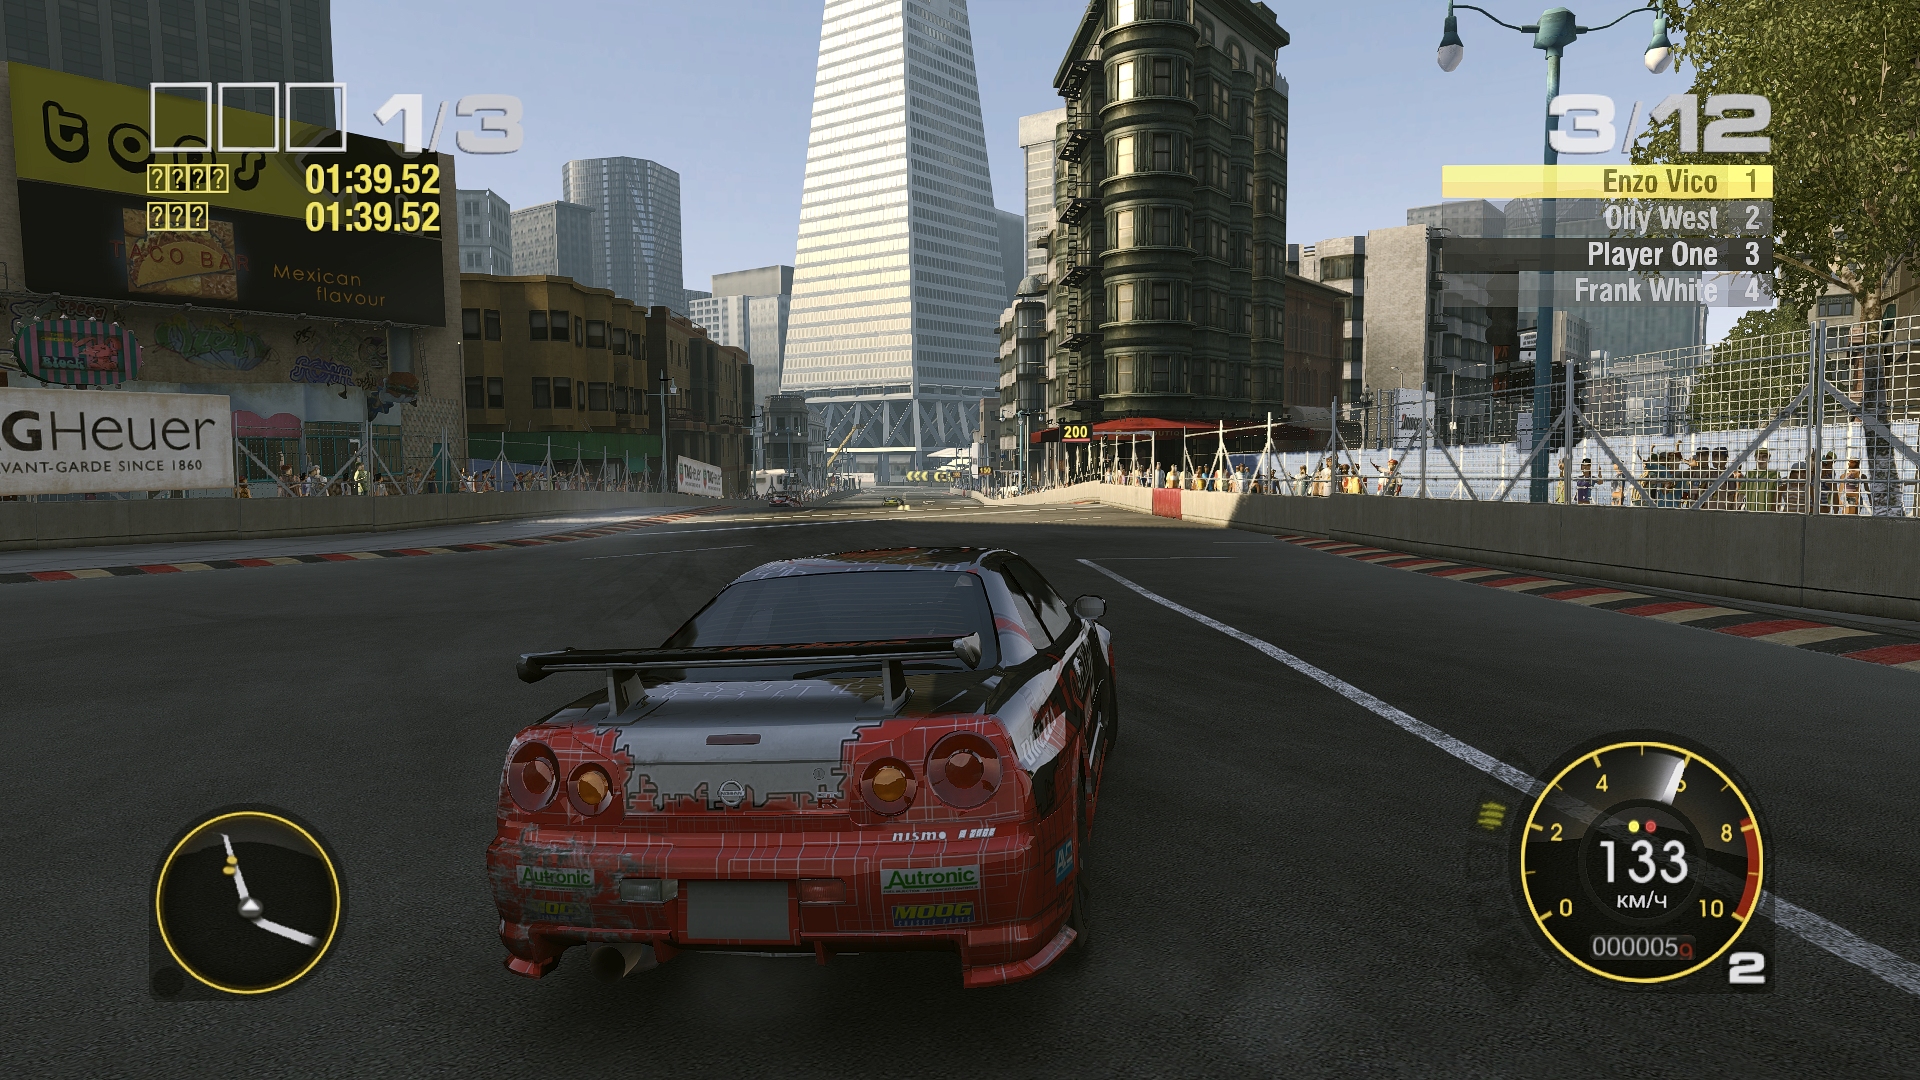
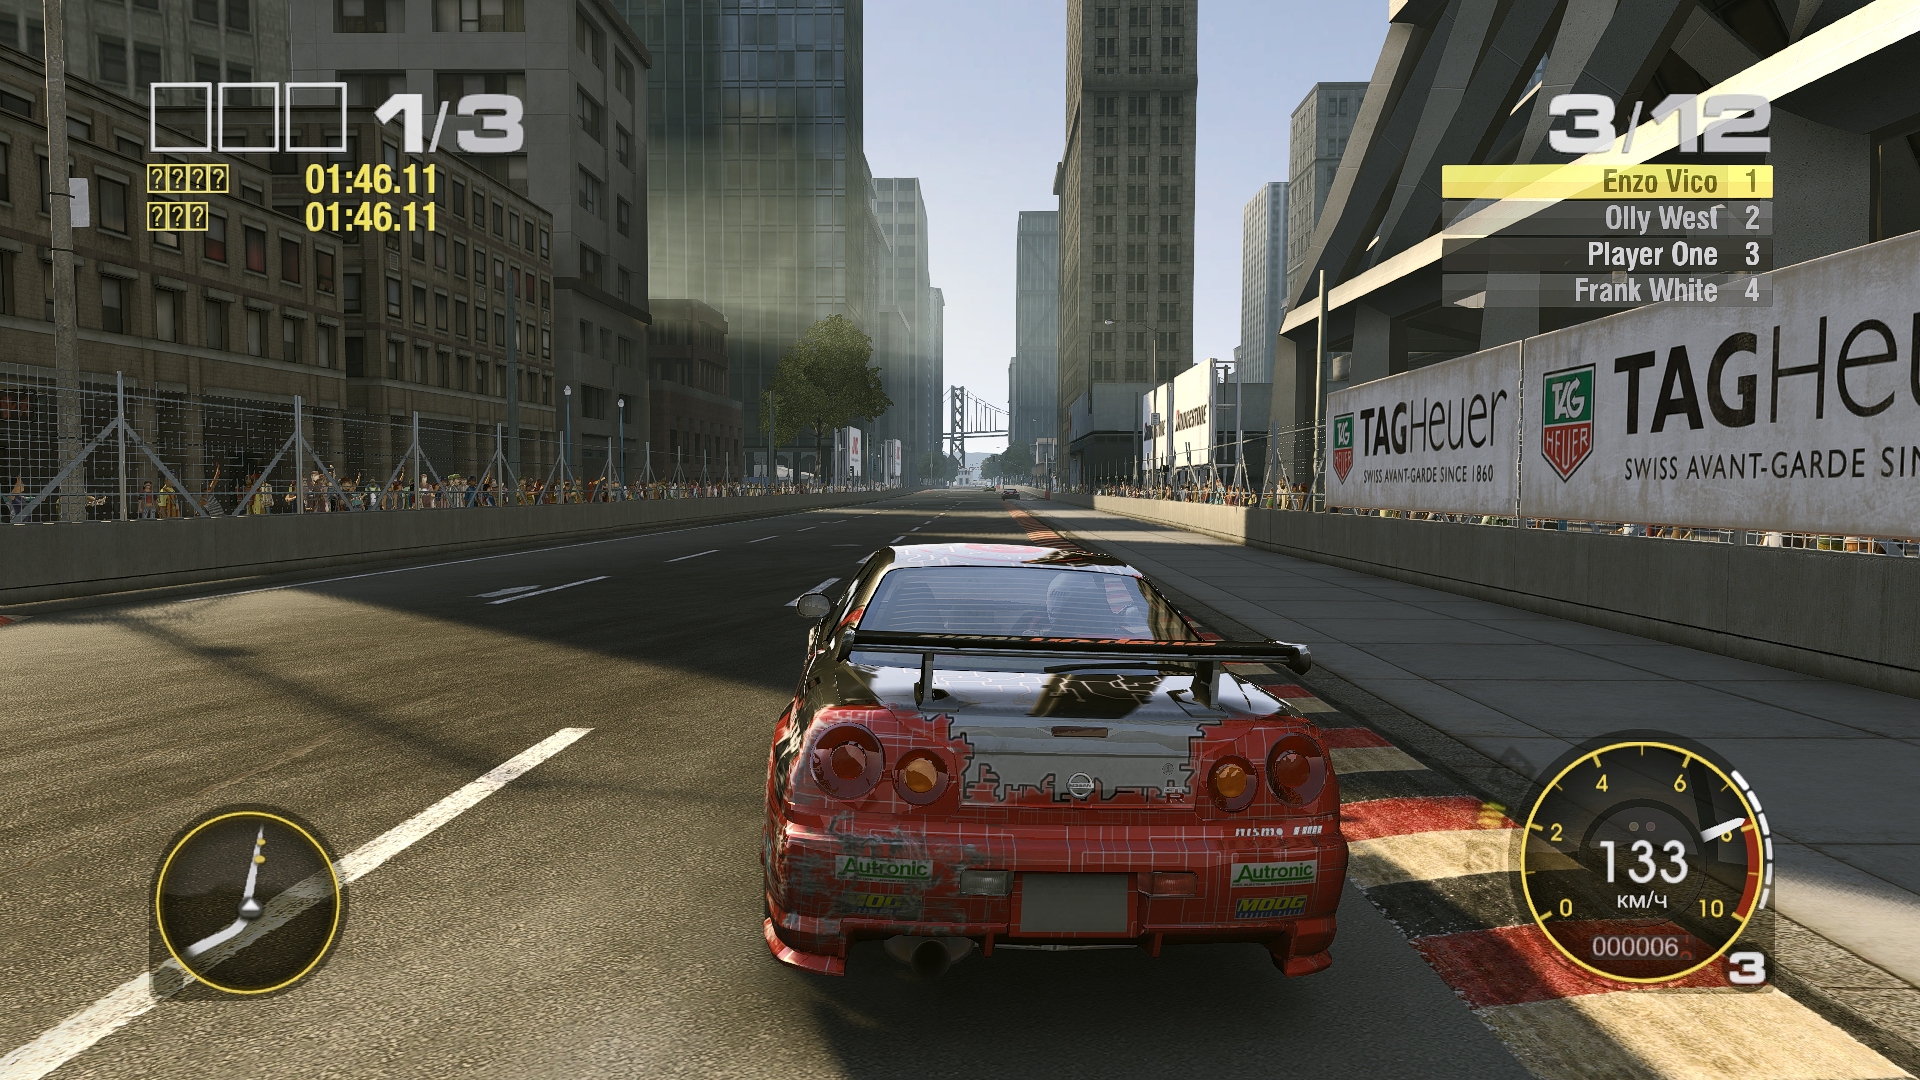
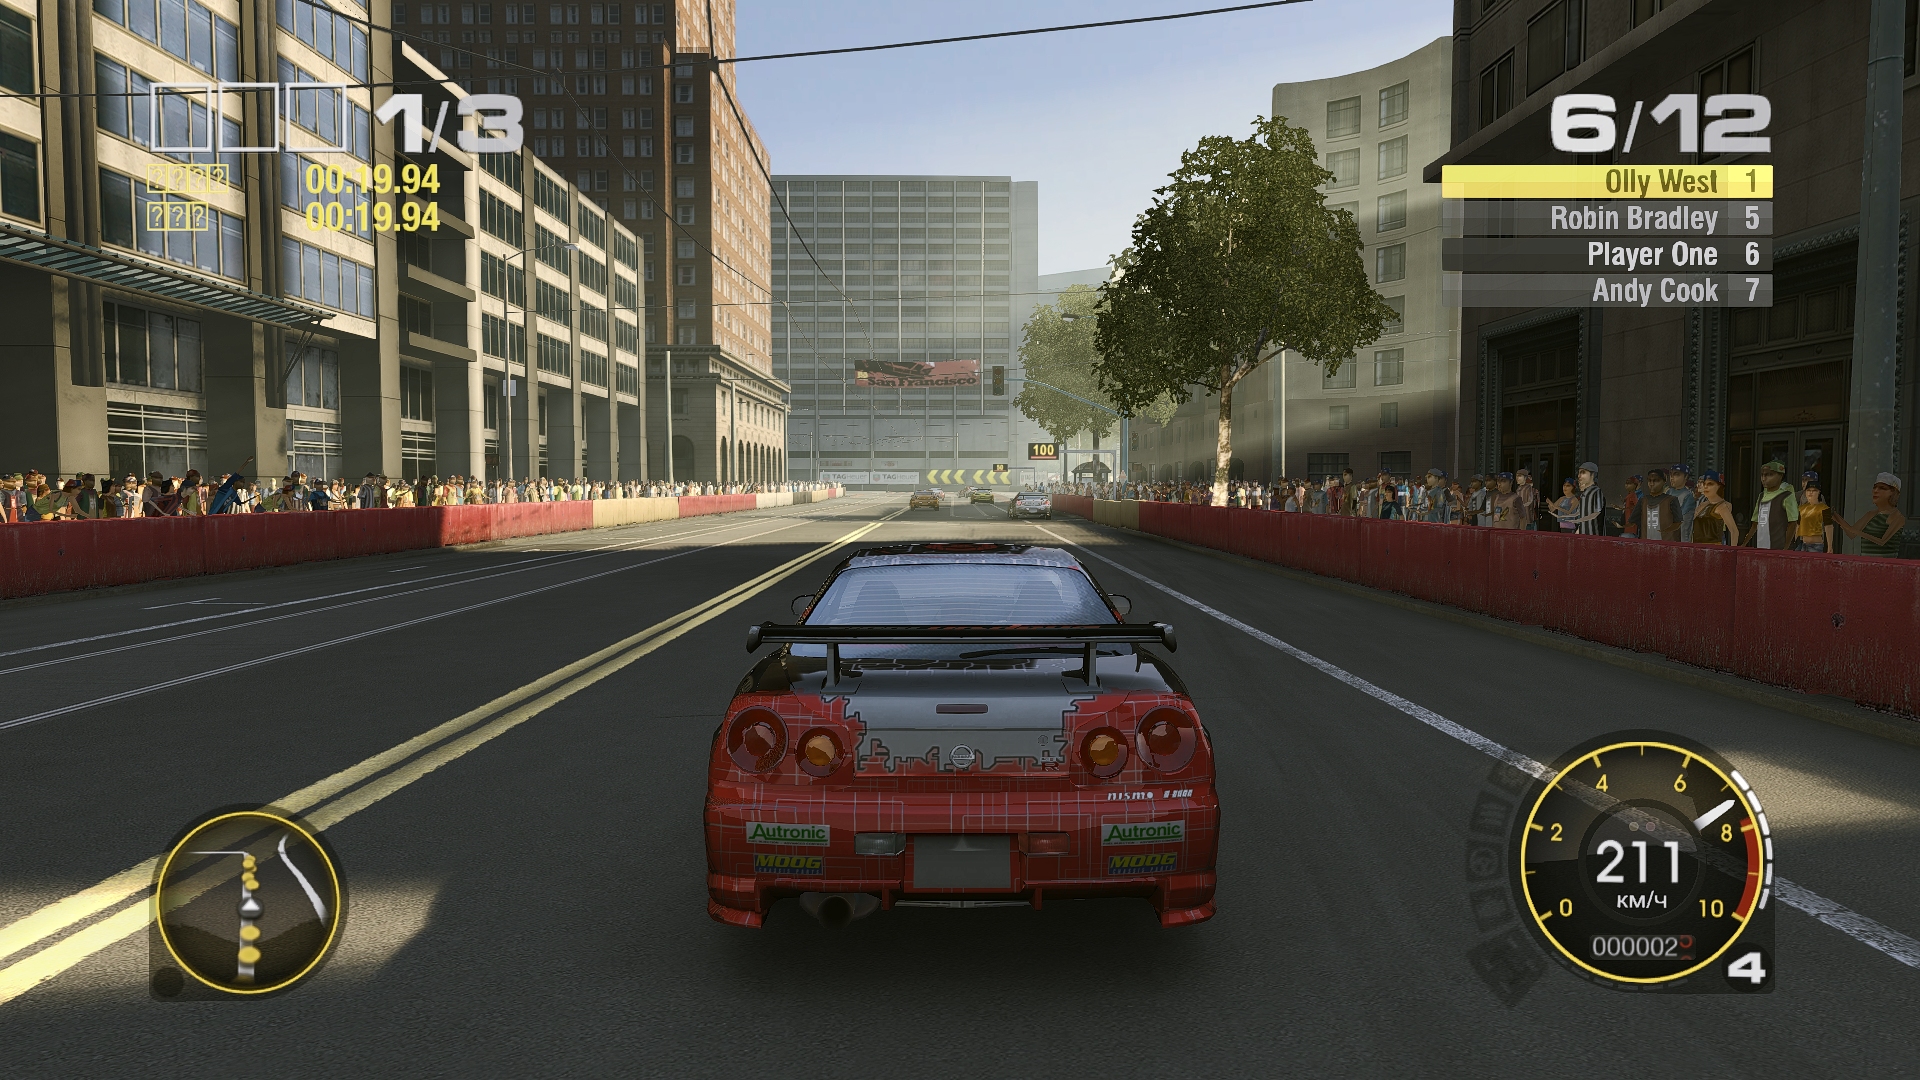
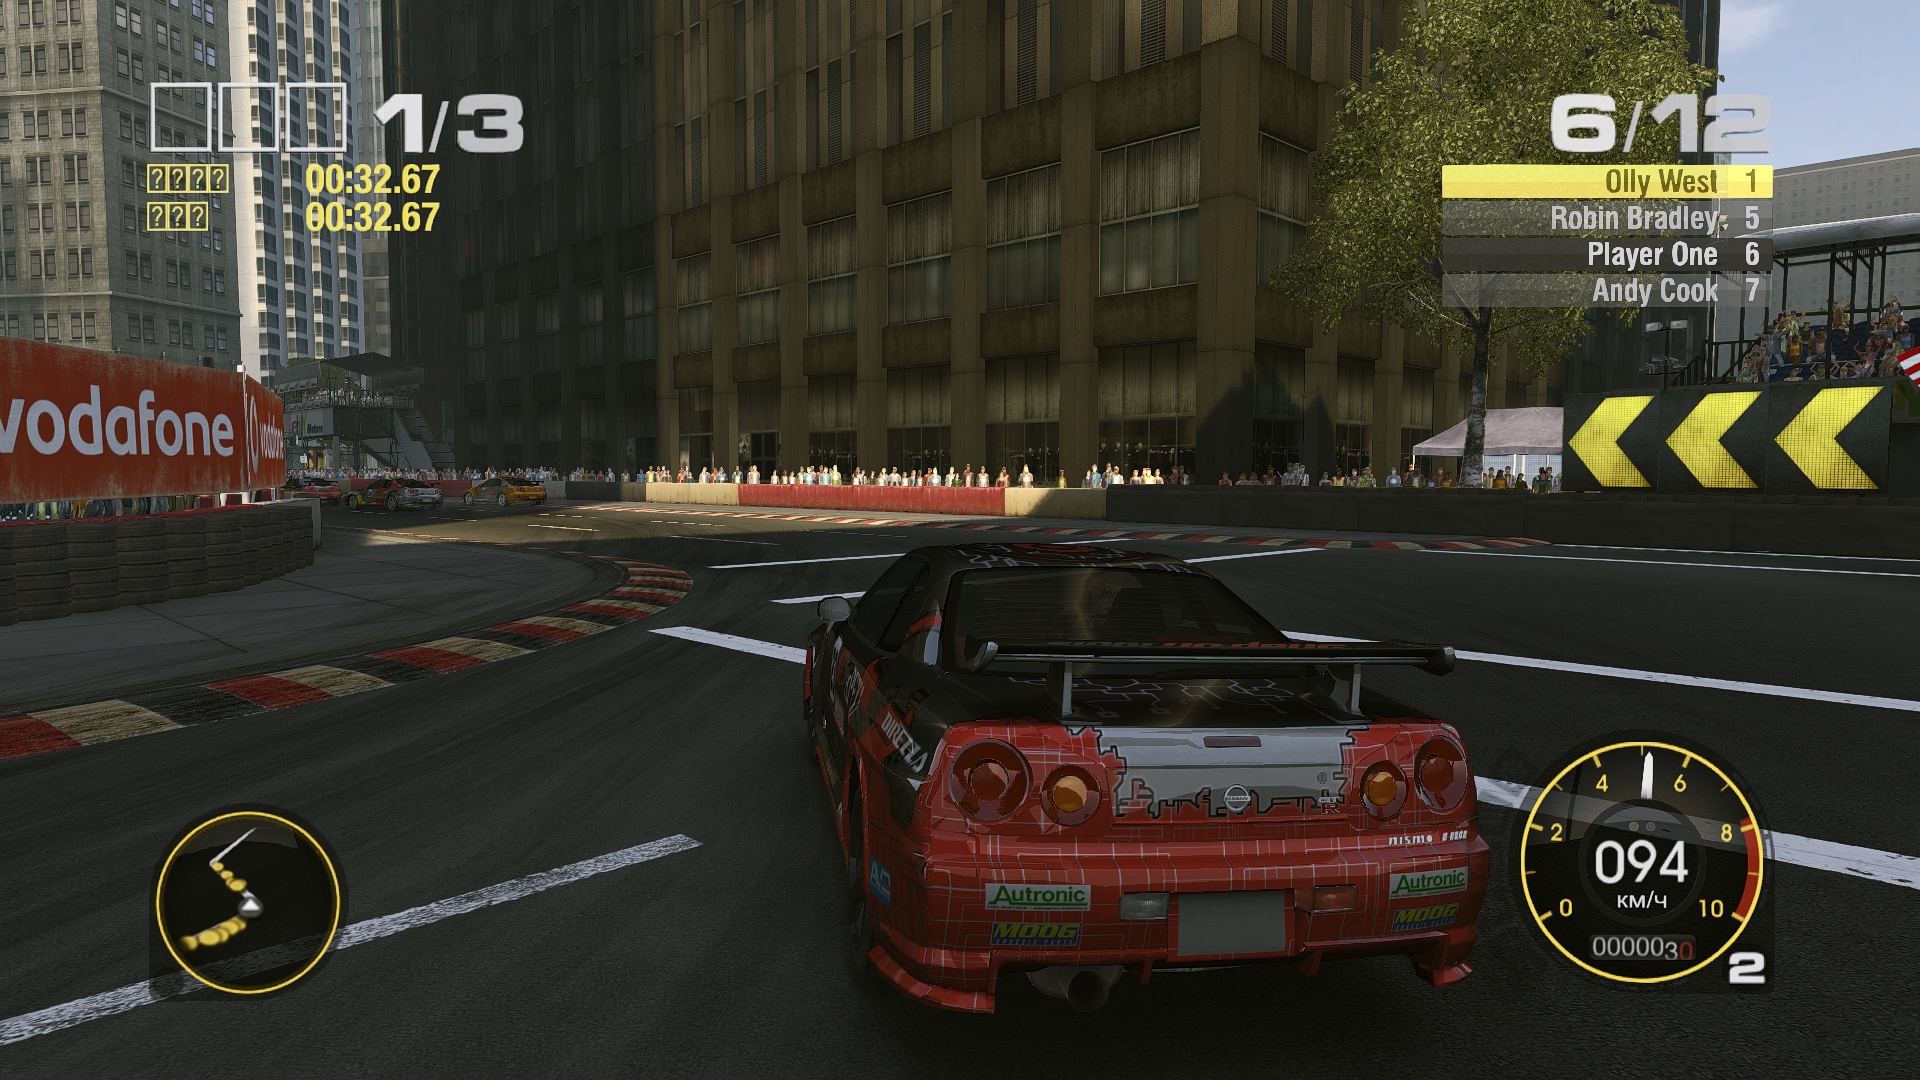
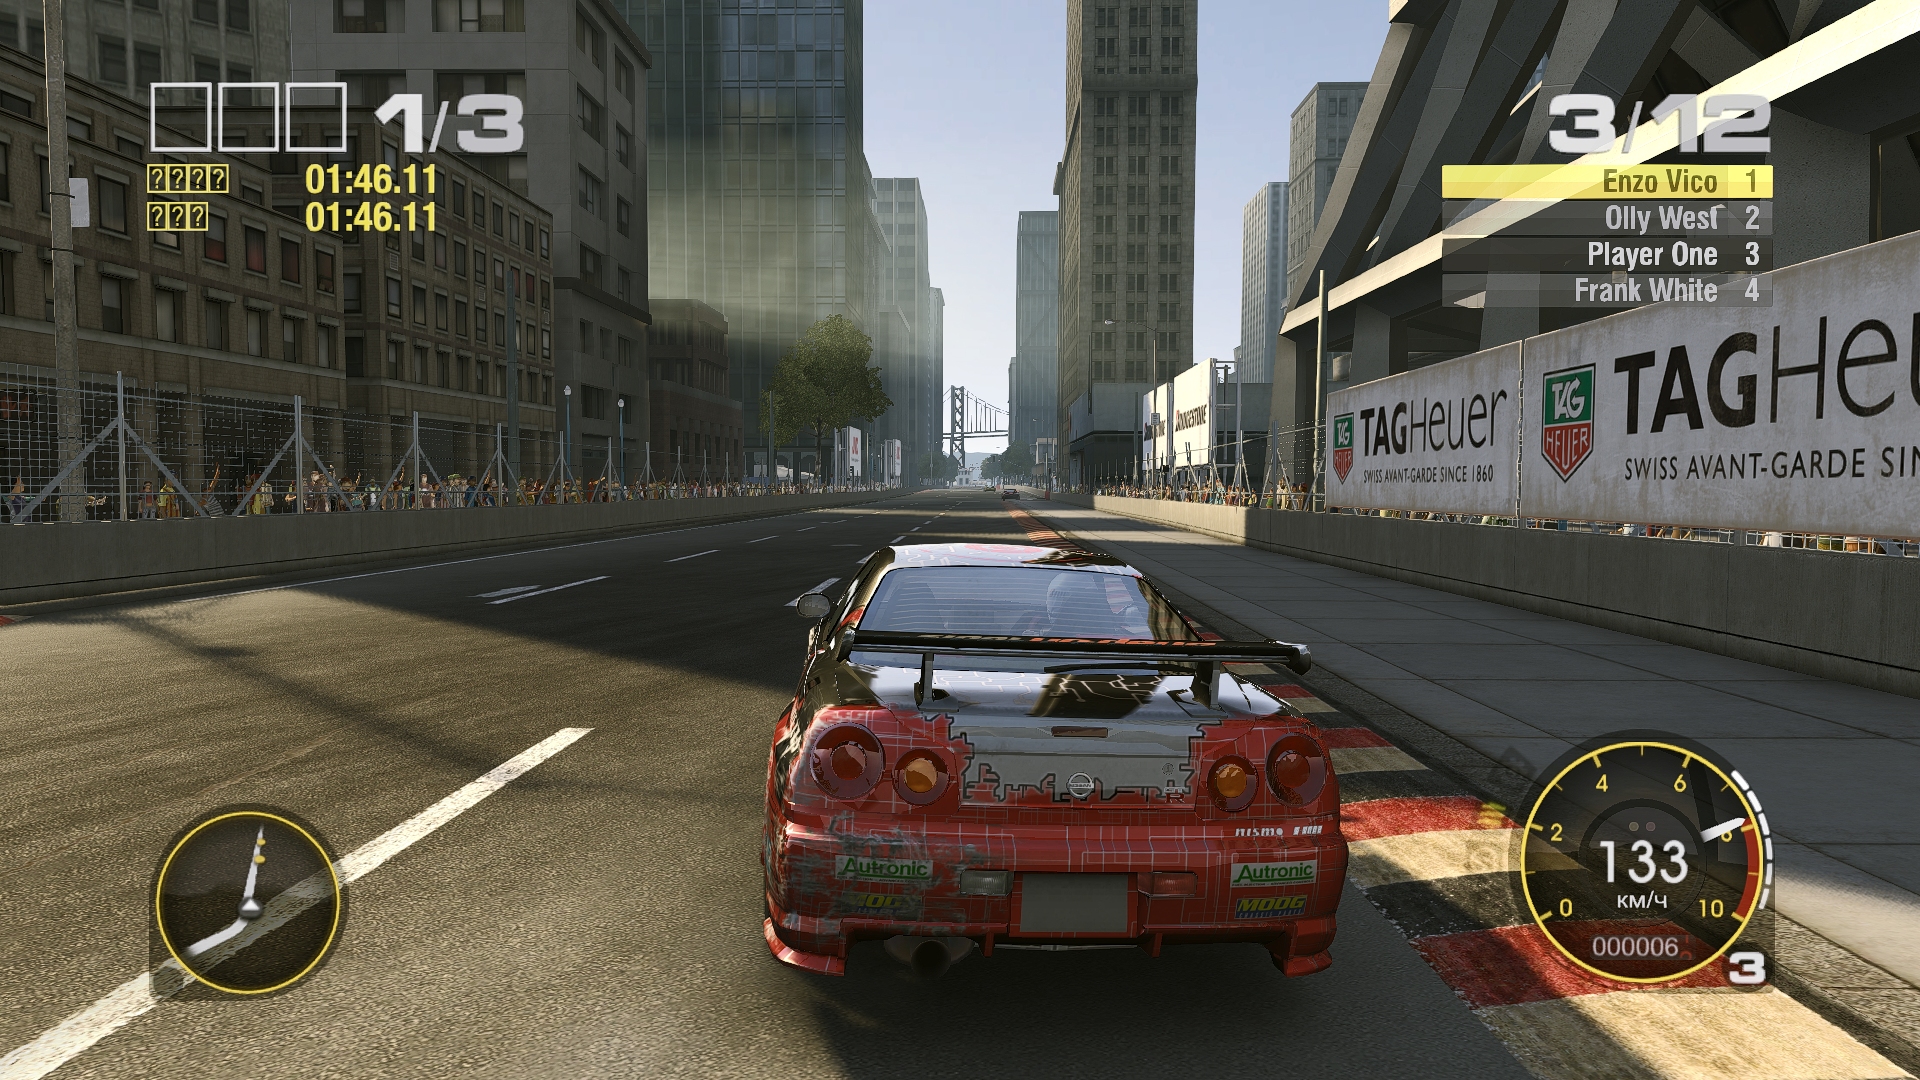
Race Driver Grid
Bu sefer kapalı-açık karşılaştırması veremiyorum çünkü orjinal halinde post-processing açık.
Her seferinde kapatıp açmak için oyunu tekrar başlatmak gerekiyor ve aynı anda aynı yerde ekran görüntüsü almak çok zor olduğu farklı birkaç görüntü verdim.
Resimlerin büyük halleri için sağ tıklayıp resim adresini(url) kopyalayıp yeni bir sekmede açabilirsiniz.

Orjinal ve Post Processing açık
8-grid.jpg


racedrivergrid073.jpg


image.jpg


1293552977.jpg


Sweetfx ve Post Processing kapalı
a_10.jpg


a_27.jpg


a_11.jpg


a_14.jpg


a_15.jpg


a_16.jpg


a_17.jpg


a_18.jpg


a_20.jpg


a_34.jpg


a_36.jpg


GRID_2013_02_21_00_33_34_00.jpg


Kod:
   /*-----------------------------------------------------------.
  /                      Choose effects                         /
  '-----------------------------------------------------------*/


// Set to 1 for ON or 0 for OFF
#define USE_SMAA_ANTIALIASING 1 //[0 or 1] SMAA Anti-aliasing : Smoothens jagged lines.
#define USE_LUMASHARPEN   1 //[0 or 1] LumaSharpen : Also sharpens the antialiased edges which makes them less smooth - I'm working on fixing that.
#define USE_BLOOM         0 //[0 or 1] Bloom : Makes bright lights bleed their light into their surroundings (relatively high performance cost)
#define USE_HDR           0 //[0 or 1] HDR : Not actual HDR - It just tries to mimic an HDR look (relatively high performance cost)
#define USE_TECHNICOLOR   0 //[0 or 1] TECHNICOLOR : Attempts to mimic the look of an old movie using the Technicolor three-strip color process (Techicolor Process 4)
#define USE_DPX           1 //[0 or 1] Cineon DPX : Should make the image look like it's been converted to DXP Cineon - basically it's another movie-like look similar to technicolor.
#define USE_LIFTGAMMAGAIN 0 //[0 or 1] Lift Gamma Gain : Adjust brightness and color of shadows, midtones and highlights (avoids clipping)
#define USE_TONEMAP       1 //[0 or 1] Tonemap : Adjust gamma, exposure, saturation, bleach and defog. (may cause clipping)
#define USE_VIBRANCE      1 //[0 or 1] Vibrance : Intelligently saturates (or desaturates if you use negative values) the pixels depending on their original saturation.
#define USE_CURVES        1 //[0 or 1] Curves : Contrast adjustments using S-curves.
#define USE_SEPIA         0 //[0 or 1] Sepia : Sepia tones the image.
#define USE_VIGNETTE      0 //[0 or 1] Vignette : Darkens the edges of the image to make it look more like it was shot with a camera lens. May cause banding artifacts.
#define USE_DITHER        0 //[0 or 1] Dither : Applies dithering to simulate more colors than your monitor can display. This lessens banding artifacts (mostly caused by Vignette)
#define USE_SPLITSCREEN   0 //[0 or 1] Splitscreen : Enables the before-and-after splitscreen comparison mode.


   /*-----------------------------------------------------------.
  /                  SMAA Anti-aliasing settings                /
  '-----------------------------------------------------------*/


#define SMAA_THRESHOLD 0.06           // [0.05 to 0.20] Edge detection threshold
#define SMAA_MAX_SEARCH_STEPS 48      // [0 to 98] Determines the radius SMAA will search for aliased edges
#define SMAA_MAX_SEARCH_STEPS_DIAG 16  // [0 to 16] Determines the radius SMAA will search for diagonal aliased edges
#define SMAA_CORNER_ROUNDING 25        // [0 to 100] Determines the percent of antialiasing to apply to corners.


// -- Advanced SMAA settings --
#define COLOR_EDGE_DETECTION 0        // [0 or 1] 1 Enables color edge detection (slower but slightly more acurate) - 0 uses luma edge detection (faster)
#define SMAA_DIRECTX9_LINEAR_BLEND 0  // [0 or 1] Using DX9 HARDWARE? (software version doesn't matter) if so this needs to be 1 - If not, leave it at 0.


   /*-----------------------------------------------------------.
  /                       LumaSharpen settings                  /
  '-----------------------------------------------------------*/
// -- Sharpening --
#define sharp_strength 1.50   // [0.10 to 3.00] Strength of the sharpening
#define sharp_clamp    0.035  // [0.000 to 1.000] Limits maximum amount of sharpening a pixel recieves - Default is 0.035


// -- Advanced sharpening settings --
#define pattern 1        // [1|2|3|4] Choose a sample pattern. 1 = Fast, 2 = Normal, 3 = Wider, 4 = Pyramid shaped.
#define offset_bias 1.0  // [0.0 to 6.0] Offset bias adjusts the radius of the sampling pattern.
                         // I designed the pattern for offset_bias 1.0, but feel free to experiment.
                           
// -- Debug sharpening settings --
#define show_sharpen 0   // [0 or 1] Visualize the strength of the sharpen (multiplied by 4 to see it better)


   /*-----------------------------------------------------------.
  /                       Bloom settings                        /
  '-----------------------------------------------------------*/
#define BloomThreshold 20.25 //[0.00 to 50.00] Threshold for what is a bright light (that causes bloom) and what isn't.
#define BloomPower 1.446     //[0.0000 to 8.0000] Strength of the bloom
#define BloomWidth 0.0142    //[0.0000 to 1.0000] Width of the bloom


   /*-----------------------------------------------------------.
  /                        HDR settings                         /
  '-----------------------------------------------------------*/
#define HDRPower 1.30  //[0.0 to 8.0] Strangely lowering this makes the image brighter
#define radius2  0.87  //[0.0 to 8.0] Raising this seems to make the effect stronger and also brighter


   /*-----------------------------------------------------------.
  /                      TECHNICOLOR settings                   /
  '-----------------------------------------------------------*/
#define TechniAmount 0.11        //[0.0 to 1.0]
#define TechniPower  2.8         //[0.0 to 8.0]
#define redNegativeAmount   0.88 //[0.0 to 1.0]
#define greenNegativeAmount 0.88 //[0.0 to 1.0]
#define blueNegativeAmount  0.88 //[0.0 to 1.0]


   /*-----------------------------------------------------------.
  /                      Cineon DPX settings                    /
  '-----------------------------------------------------------*/
#define Red   8.0  //[1.0 to 15.0]
#define Green 8.0  //[1.0 to 15.0]
#define Blue  13.0  //[1.0 to 15.0]


#define ColorGamma    2.5  //[0.1 to 2.5] Adjusts the colorfulness of the effect in a manner similar to Vibrance. 1.0 is neutral.
#define DPXSaturation 3.0  //[0.0 to 8.0] Adjust saturation of the effect. 1.0 is neutral.


#define RedC   0.36  //[0.6 to 0.2]
#define GreenC 0.36  //[0.6 to 0.2]
#define BlueC  0.36  //[0.6 to 0.2]


#define Blend 0.2    //[0.0 to 0.1] How strong the effect should be.


   /*-----------------------------------------------------------.
  /                      Lift Gamma Gain settings               /
  '-----------------------------------------------------------*/
#define RGB_Lift  float3(1.000, 1.000, 1.000)  //[0.000 to 2.000] Adjust shadows for Red, Green and Blue
#define RGB_Gamma float3(1.000, 1.000, 1.000)  //[0.000 to 2.000] Adjust midtones for Red, Green and Blue
#define RGB_Gain  float3(1.000, 1.000, 1.000)  //[0.000 to 2.000] Adjust highlights for Red, Green and Blue


   /*-----------------------------------------------------------.
  /                        Tonemap settings                     /
  '-----------------------------------------------------------*/
#define Gamma 0.75        //[0.00 to 2.00] Adjust midtones


#define Exposure 0.00    //[-1.00 to 1.00] Adjust exposure


#define Saturation 0.00  //[-1.00 to 1.00] Adjust saturation


#define Bleach 0.00      //[0.00 to 1.00] Brightens the shadows and fades the colors


#define Defog 0.000  //[0.00 to 1.00] How much of the color tint to remove
#define FogColor float3(0.00, 0.00, 0.00) //[0.00 to 1.00, 0.00 to 1.00, 0.00 to 1.00] What color to remove - default is blue


   /*-----------------------------------------------------------.
  /                       Vibrance settings                     /
  '-----------------------------------------------------------*/
#define Vibrance -0.20 //[-1.0 to 1.0] Intelligently saturates (or desaturates if you use negative values) the pixels depending on their original saturation.


   /*-----------------------------------------------------------.
  /                        Curves settings                      /
  '-----------------------------------------------------------*/
#define Curves_contrast 0.40 //[-1.0 to 1.0] The amount of contrast you want


// -- Advanced curve settings --
#define Curves_formula 7      //[1|2|3|4|5|6|7] The constrast s-curve you want to use. 


   /*-----------------------------------------------------------.
  /                         Sepia settings                      /
  '-----------------------------------------------------------*/
#define ColorTone float3(1.40, 1.10, 0.90) //[0.00 to 1.00, 0.00 to 1.00, 0.00 to 1.00] What color to tint the image
#define GreyPower  0.11                    //[0.0 to 1.0] How much desaturate the image before tinting it
#define SepiaPower 0.58                    //[0.0 to 1.0] How much to tint the image


   /*-----------------------------------------------------------.
  /                       Vignette settings                     /
  '-----------------------------------------------------------*/
#define VignetteRadius 1.00   //[-1.00 to 3.00] lower values = stronger radial effect from center
#define VignetteAmount -1.00  //[-2.00 to 1.00] Strength of black. -2.00 = Max Black, 1.00 = Max White.
#define VignetteSlope 8       //[1 to 16] How far away from the center the change should start to really grow strong (odd numbers cause a larger fps drop than even numbers)
#define VignetteCenter float2(0.500, 0.500)  //[0.00 to 1.00] Center of effect.


   /*-----------------------------------------------------------.
  /                        Dither settings                      /
  '-----------------------------------------------------------*/
//No settings yet, beyond switching it on or off in the top section.


//Note that the checkerboard pattern used by Dither, makes an image harder to compress.
//This can make your screenshots and video recordings take up more space.


   /*-----------------------------------------------------------.
  /                     Splitscreen settings                    /
  '-----------------------------------------------------------*/
#define splitscreen_mode 3  //[1|2|3|4|5]  1 = Vertical 50/50 split, 2 = Vertical 25/50/25 split, 3 = Vertical 50/50 angled split, 4 = Horizontal 50/50 split, 5 = Horizontal 25/50/25 split
 

M.Şamil CAN

Dekan
Katılım
23 Ekim 2009
Mesajlar
5,841
Reaksiyon puanı
105
Puanları
63
AA ve enb filtreleri dışında çok fark yaratmıyor. AA en önemli etkeni zaten geri kalanı renkler tonlamalar vs ki fazlasını da sunamaz oyununda sınırı var sonuçta güzel bir uygulama
 

Regionella

Profesör
Katılım
9 Aralık 2006
Mesajlar
1,575
Reaksiyon puanı
7
Puanları
38
Konuyu hortlatayım.

Arkadaşlar minimum hangi ekran kartı olması gerek kullanabilmek için

Bende laptop gtx860m var.

kullansam ısınma problemi vs yaratır mı, kartı yakmayalım bir de..
 

Ben Kenobi

Dekan
Katılım
6 Kasım 2011
Mesajlar
7,336
Reaksiyon puanı
3,155
Puanları
113
Bosuna hortlatmıssınız.
Çok da ise yaramıyor, zaten smaa yöntemi iyi bir yöntem değil, hem yavas hem de dıs çizgiler hariç hiçbir çizgiyi gideremiyor.
Bu konuda en iyisi temporal aa yöntemi.
Onu da en iyi unreal engine yapıyor.
Sharpen filtresi is görebilir ama gerek yok, hızınızı pek düsürmese de bu eklenti gereksiz artık bence.
Zamanında baya heyecanla açmısım, ekran görüntüsü eklemis uğrasmısım ama o zamandan bu zamana pek de gelisme göstermedi, son iki yıldır yeni versiyonlarda eklenen hiçbir özellik pratikte ise yaramıyor, ne yapayım crt distortion efektini ya da çizgi film efektini, vs, hadi iyi forumlar...
 
Üst